
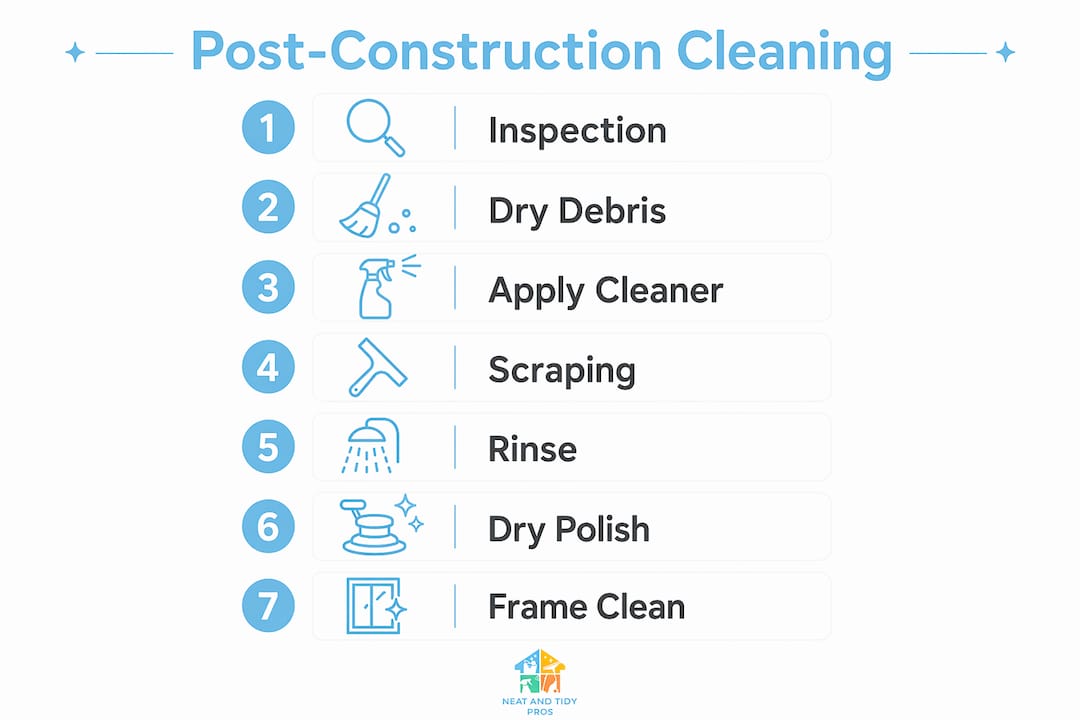
Post construction window cleaning, known in the industry as construction final clean, is the specialized process of removing paint, caulk, adhesive, stickers, tape residue, and construction dust from glass surfaces, frames, sills, and tracks after a build or renovation. The post construction window cleaning steps follow a specific sequence: inspect, dry debris removal, residue softening, razor blade scraping, rinsing with purified water, and detailed frame and track cleaning. Skipping any stage risks scratches, streaks, or residue that no amount of routine cleaning will fix. This guide gives homeowners and contractors the exact process, tools, and pitfalls to avoid for a polished, professional result.
What tools and preparations are needed for post construction window cleaning?
The right tools separate a scratch-free finish from a costly repair. Construction residues like dried caulk, paint overspray, and adhesive require different tools than everyday window cleaning. Gathering everything before you start prevents mid-job shortcuts that damage glass.
Essential tool checklist
- Glass-safe razor scrapers with fresh, single-edge blades (never reuse a blade between jobs)
- pH-balanced glass cleaner or a mild dish soap solution (avoid ammonia-based products on tinted or filmed glass)
- Microfiber cloths in high quantity. Microfiber cloths and squeegees outperform paper towels by eliminating lint and streaks during polishing.
- Professional squeegee with a fresh rubber blade, 12-inch or 18-inch depending on pane size
- Deionized or purified water system. Pure-water systems prevent mineral deposits and streaks, especially in hard water areas.
- Soft-bristle brush and vacuum for dry debris removal from tracks and sills
- Extension pole or ladder rated for your working height
- Protective gloves to guard against blade cuts and chemical exposure
- Plastic drop cloths to protect floors and sills from runoff
Choosing the right cleaning solution
pH-balanced cleaners work on most standard glass. Avoid anything abrasive or solvent-heavy unless the label specifies glass safety. For filmed or UV-coated glass, check the manufacturer’s guidelines before applying any product. V-KOOL specifies not washing treated windows until 30 days after installation to preserve film integrity and warranty coverage. That restriction applies to many modern window films, so confirm before you start.
| Residue type | Recommended tool | What to avoid |
|---|---|---|
| Paint overspray | Wet razor scraper, pH cleaner | Dry scraping, abrasive pads |
| Caulk and sealant | Razor scraper, mild solvent | Circular scraping motions |
| Adhesive and sticker residue | Adhesive remover, microfiber | Paper towels, steel wool |
| Construction dust | Soft brush, vacuum, purified water rinse | Dry wiping on glass |
| Mineral deposits | Deionized water, squeegee | Tap water rinse |
Pro Tip: Inspect every blade before use. A single nick in a razor blade will drag across glass and leave a scratch that cannot be buffed out.
What are the step-by-step post construction window cleaning steps?
A professional workflow covers six stages addressing both interior and exterior surfaces to confirm no residue remains. Follow them in order. Jumping ahead, especially to scraping before softening residues, is the most common cause of scratched glass on construction sites.
Step 1: Initial inspection
Walk every window before touching it. Identify the residue types present: paint, caulk, tape, stickers, or construction dust. Note any pre-existing chips or cracks so you are not blamed for damage you did not cause. Check whether any protective film is still in place. Removing protective films should only happen after approval from the general contractor or homeowner, and only when the manufacturer’s waiting period has passed.
Step 2: Dry debris removal
Vacuum tracks, sills, and frames before any liquid touches the glass. Window tracks collect metal shavings, grit, and abrasive debris that will scratch glass if dragged across it during wet cleaning. Use a soft-bristle brush to loosen packed grit from corners, then vacuum again. This step takes five minutes per window but prevents hours of scratch repair.
Step 3: Apply cleaning solution to soften residues
Spray a pH-balanced cleaner generously over the entire glass surface. Let it sit for two to three minutes. The solution softens dried adhesive, paint edges, and caulk so the razor blade glides rather than drags. For heavy paint overspray, a second application after the first pass is normal. Never rush this stage by scraping immediately after spraying.
Step 4: Razor blade scraping
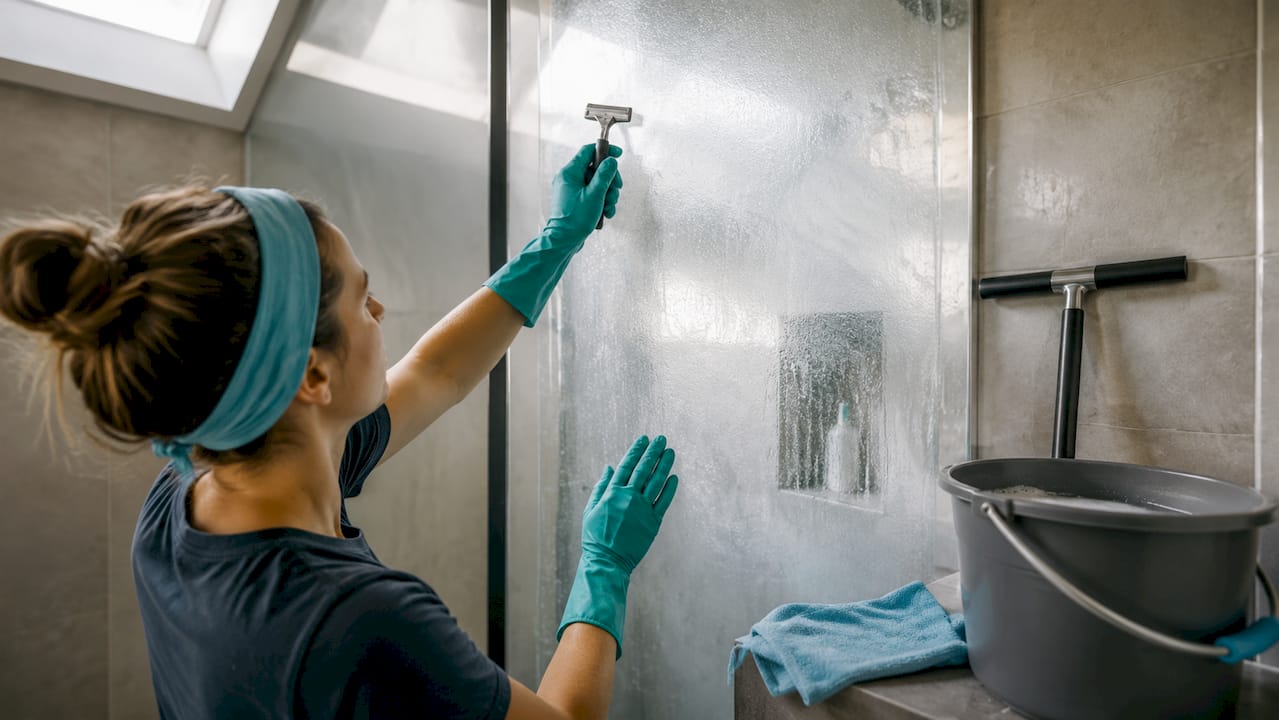
This is the highest-risk step and the one most homeowners get wrong. Wet scraping with a fresh blade kept flat at a low angle with light pressure prevents scratches. The blade should float on the cleaning solution, not dig into the glass. Hold the scraper at roughly 30 degrees to the surface. Work in straight, overlapping strokes from top to bottom. Never scrape in circular motions.
Blade failure during scraping results from dullness, dry glass, or an improper angle rather than the hardness of the residue. Change blades frequently, especially on large panes. A fresh blade on wet glass removes even stubborn paint without leaving a mark.
Pro Tip: Keep a spray bottle in your non-dominant hand. Re-wet the glass every few strokes to maintain lubrication throughout the scraping pass.
Step 5: Rinse with purified water
Rinse the entire pane with deionized or purified water to flush away loosened residue and cleaning solution. Tap water leaves mineral deposits that dry as white spots, especially in Southern California and other hard water regions. A water-fed pole with a purified water tank is the most efficient tool for exterior panes on multi-story buildings.
Step 6: Polish dry with squeegee and microfiber
Pull a clean squeegee from top to bottom in overlapping strokes, wiping the blade with a microfiber cloth between each pass. Finish edges and corners with a dry microfiber cloth. Avoiding paper towels at this stage matters because paper fibers leave lint and micro-scratches on polished glass.
Step 7: Detailed frame, sill, and track cleaning
Glass can look perfect while tracks and frames still hold grit. Fine grit in tracks and sills causes damage during rinsing and drying phases and leads to re-soiling after cleaning. Wipe frames with a damp microfiber cloth, scrub tracks with a small brush, and vacuum again. This step determines whether the window looks finished or just wiped down.
Comparison: DIY vs. professional approach
| Factor | DIY approach | Professional approach |
|---|---|---|
| Blade technique | Higher scratch risk without training | Trained wet scraping, fresh blades per pane |
| Water quality | Tap water, mineral deposit risk | Deionized water systems standard |
| Track and frame cleaning | Often skipped | Included in every pass |
| Residue identification | Limited experience | Recognizes paint, caulk, adhesive on sight |
| Staging passes | Single pass typical | Multi-pass staged cleaning standard |
What mistakes should you avoid during window cleaning after construction?
Most window damage during post-construction cleaning comes from a small set of repeatable errors. Knowing them in advance costs nothing. Fixing scratched glass costs significantly more.
- Scraping dry glass. Dry scraping is the single fastest way to scratch a pane. Always apply solution first.
- Using a dull or nicked blade. Replace blades after every two to three panes on heavily contaminated glass.
- Scraping in circular motions. Circular scraping creates visible swirl marks that catch light. Always work in straight lines.
- Ignoring tracks and frames. Grit left in tracks migrates back onto glass during the first rain or window operation.
- Using paper towels for polishing. Paper towels leave lint and create micro-abrasion on polished surfaces.
- Applying harsh chemicals to filmed glass. Ammonia and solvent-based cleaners degrade UV films and void manufacturer warranties.
- Skipping the inspection step. Pre-existing chips become your liability if you do not document them before starting.
“Treat post-construction window cleaning as a deep clean plus inspection, not routine maintenance. The mindset shift changes how thoroughly you work through each stage.” — Post-Construction Window Cleaning: A Specialized Approach
When you encounter a stubborn residue that does not respond to a second application of cleaner and careful scraping, stop and reassess. Forcing the blade harder is never the answer. Switch to a targeted adhesive remover rated for glass, re-wet, and try again with a fresh blade. On large projects, staging cleaning passes by separating bulk debris removal from the final detail clean prevents grit from one area recontaminating a finished pane.
How do you maintain windows after a post-construction clean?
A thorough post-construction clean sets a high baseline. Maintenance keeps it there without repeating the full process.
- Dust frames and tracks monthly. A soft brush or vacuum removes grit before it packs in and scratches glass during operation.
- Use purified water for routine cleaning. Tap water leaves mineral deposits over time, especially in hard water areas. A simple filtered spray bottle works for most homeowners.
- Avoid harsh chemicals on any glass with a film or UV coating. Stick to pH-balanced cleaners and check the manufacturer’s care guide for your specific glass type.
- Inspect windows after any nearby work. Paint touch-ups, caulking, or landscaping near windows deposits residue that is far easier to remove fresh than after it cures.
- Follow manufacturer timelines strictly. V-KOOL and similar manufacturers require a waiting period before the first wash on treated glass. Washing too early voids the warranty and can lift the film.
Pro Tip: Keep a small supply of microfiber cloths and a spray bottle of pH-balanced cleaner near each window access point. Catching a fresh smudge or residue spot in the first 24 hours takes 30 seconds. Waiting a week turns it into a scraping job.
Key Takeaways
Effective post-construction window cleaning requires a staged, tool-specific process that addresses glass, frames, tracks, and sills in the correct order to avoid scratches and achieve a lasting finish.
| Point | Details |
|---|---|
| Stage your cleaning passes | Separate bulk debris removal from detail cleaning to prevent grit recontamination. |
| Always scrape wet | Apply cleaning solution before any blade contact to protect glass from scratches. |
| Replace blades frequently | A dull or nicked blade on dry glass is the leading cause of construction clean scratches. |
| Clean tracks and frames | Grit left in tracks migrates back onto glass and causes re-soiling after cleaning. |
| Use purified water for rinsing | Deionized water prevents mineral deposits and streaks, especially in hard water areas. |
What I have learned from years of post-construction window cleaning
The biggest mistake I see on construction sites is treating window cleaning as the last five minutes of a job. Contractors rush it. Homeowners underestimate it. Both end up with scratched glass or streaky panes that look worse than before cleaning started.
The mindset shift that actually works is treating every window as a two-part job: a deep clean and an inspection. When you approach it that way, you slow down at the right moments. You check the blade. You re-wet the glass. You vacuum the track before you touch the frame. Those small pauses are what separate a professional result from a frustrating redo.
The track and frame detail is where most DIY attempts fall apart. I have seen spotless glass on a window that slides on a track full of metal shavings. The first time that window opens after move-in, it grinds grit across the bottom of the pane. That scratch did not happen during cleaning. It happened because the track was never properly cleaned. Thorough post-renovation cleaning always includes the full window assembly, not just the glass.
One more thing: staged passes are not optional on large projects. Trying to do everything in one sweep on a 20-window new build means the debris you kicked up at window one has settled on window ten by the time you get there. Bulk removal first, detail clean second, punch-list third. That sequence is not extra work. It is the only way to avoid going back.
— Neat
Professional post-construction window cleaning from Neatandtidypros
Post-construction window cleaning done right requires specialized tools, trained technique, and enough time to work through every stage properly. Most homeowners and contractors do not have all three on the day of final walkthrough.

Neatandtidypros provides dedicated post-construction cleaning services for residential and commercial projects across California. Our crews bring deionized water systems, fresh razor blades, and a staged multi-pass process to every job. We clean glass, frames, tracks, and sills to a finished standard that holds up at final inspection. View the full range of cleaning services or contact Neatandtidypros directly to schedule your post-construction window clean.
FAQ
What are the basic post construction window cleaning steps?
The core steps are inspection, dry debris removal, cleaning solution application, wet razor blade scraping, purified water rinsing, and detailed frame and track cleaning. Professional workflows cover both interior and exterior surfaces across six stages.
Can you use a razor blade on new construction windows?
Yes, provided the glass is wet, the blade is fresh, and you hold it at a low angle with light pressure. Dry scraping or using a dull blade significantly increases the risk of permanent scratches.
How do you clean windows after renovation without streaks?
Rinse with deionized or purified water and polish with a squeegee and microfiber cloth. Tap water leaves mineral deposits that dry as streaks, especially in hard water areas.
Should you clean window tracks after construction?
Cleaning tracks is not optional. Skipping track cleaning leaves abrasive grit that scratches glass the first time the window is operated and makes the finished job look incomplete.
How soon can you wash windows with a film or UV coating after installation?
Wait for the manufacturer’s specified period before washing. V-KOOL requires 30 days post-installation before the first wash to protect film integrity and maintain warranty coverage.