
Pressure washing concrete means using a high-pressure water spray to strip dirt, mildew, oil, salt, and other deposits from concrete surfaces like driveways, patios, and walkways. It works fast and produces a dramatic result, but the wrong pressure setting or nozzle on the wrong surface can etch or gouge the concrete permanently. The sections below cover everything you need to make a smart call: the right equipment settings, step-by-step technique, stain-specific fixes, and clear guidance on when to hand the job to a pro.
Key Takeaways
Pressure washing concrete is safe and effective when you match the pressure setting and nozzle to the surface condition, wait 30 days on new concrete, and always run a test patch before committing to a full pass.
| Point | Details |
|---|---|
| Minimum PSI for concrete | Use at least 1,500 psi; 2,500–3,000 psi cleans faster on standard driveways. |
| New concrete rule | Wait at least 30 days after pouring before pressure washing to avoid curing damage. |
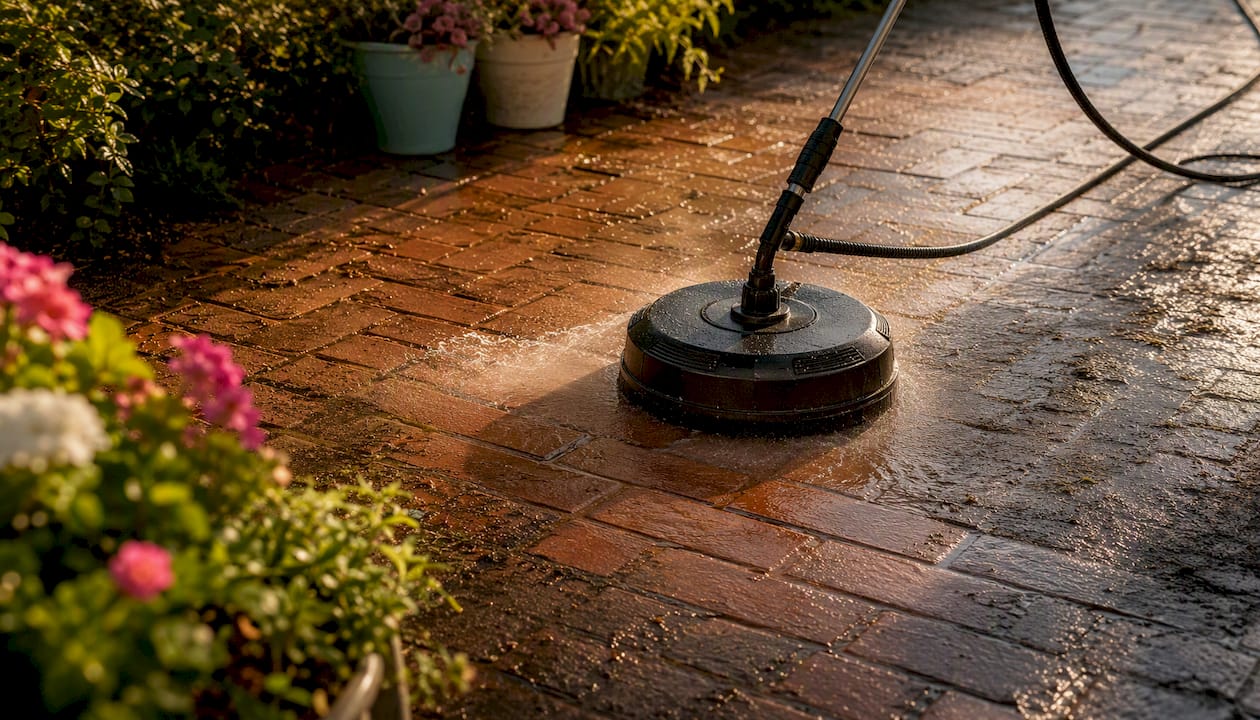
| Surface cleaner advantage | Attachments reduce streaking on large flat areas compared with a hand-held wand. |
| Stain-specific prep | Oil needs degreaser pretreat; mildew needs biocide first at lower pressure; rust needs oxalic acid. |
| When to hire a pro | Large areas, embedded oil, decorative finishes, or hot-water requirements call for professional equipment. |
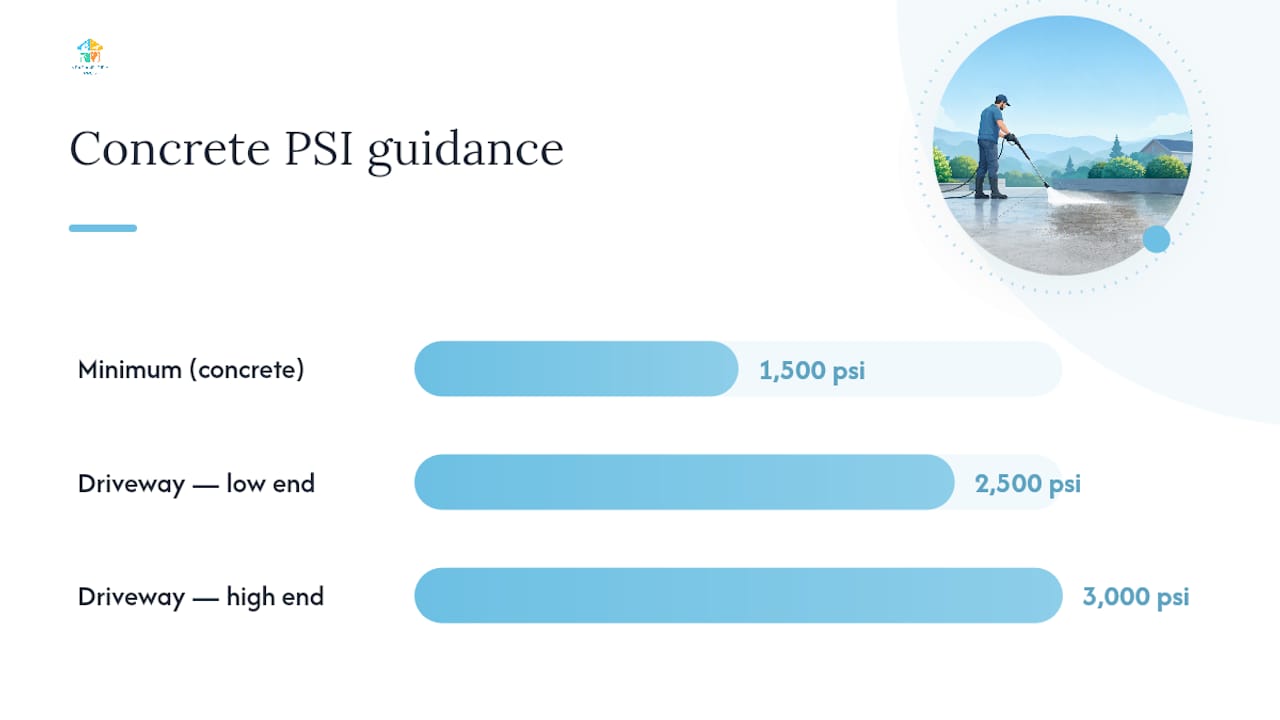
Table of Contents
- What is pressure washing concrete, and when do homeowners use it?
- When is pressure washing a good idea, and when should you skip it?
- What equipment and settings work best for concrete?
- How to prepare the area before you start
- Step-by-step technique for pressure washing concrete
- How to handle common concrete stains
- Aftercare: sealing, how long results last, and cleaning frequency
- Typical cost ranges and when to hire a professional
- Common mistakes homeowners make, and how to fix them
- What professional cleaners know that most guides skip
- Sources
What is pressure washing concrete, and when do homeowners use it?
At its core, pressure washing concrete is the application of a high-pressure water stream, typically from a gas or electric pump unit, to blast loose and flush away surface contaminants. The mechanical force does most of the work. According to Briggs & Stratton, high-pressure water is the primary cleaning method for removing grease, oil, dirt, and salt from concrete, with cleaning solutions added only when contamination is stubborn. Hot-water systems are the preferred choice for grease and oil because heat helps emulsify hydrocarbons, making them easier to lift. Cold-water units handle general dirt and mildew well when paired with the right detergent.
Homeowners reach for a pressure washer most often for:
- Driveways with embedded tire marks, oil drips, and road salt
- Patios covered in mildew, algae, or years of ground-in grime
- Walkways and front steps that have become slippery or discolored
- Garage aprons where vehicle fluids accumulate
The expected outcomes are straightforward: a cleaner, brighter surface; a reduced slip hazard from algae or mildew; and a properly prepped base before applying a sealer or fresh paint.
When is pressure washing a good idea, and when should you skip it?
Heavy dirt buildup, oil stains, mildew, and any surface you plan to seal or paint are all good reasons to pressure wash. The results are visible within minutes. The process is far faster than scrubbing by hand.
A few situations call for a pause, though.
New concrete is the biggest one. Hotsy recommends waiting until the concrete has properly cured before pressure washing newly poured concrete, because curing concrete is still gaining strength and high-pressure water can damage its surface during that window. Waiting until curing is complete is safest.
Concrete that looks dry on the surface can still be curing underneath. Pressure washing too early can pull out the cement paste, leaving a rough, weakened surface that no sealer will fully fix.
Other situations to avoid or approach carefully:
- Decorative or stamped concrete with thin surface coatings that high pressure can strip
- Concrete with visible cracks or loose sections where water can force its way in and worsen the damage
- Surfaces near building foundations where water intrusion into joints is a real risk
The physical risks to the operator are real too. Kickback from a high-pressure wand at close range can cause serious injury. Eye protection, closed-toe footwear, and gloves are non-negotiable.
Pro Tip: Before you commit to a full pass, test a small, inconspicuous patch at your intended pressure setting. If the surface shows any fuzzing, pitting, or color change, drop the pressure or switch to a wider nozzle before continuing.
What equipment and settings work best for concrete?
Concrete is one of the more forgiving surfaces to pressure wash, but the equipment choices still matter. Consumer Reports recommends at least 1,500 psi for concrete, with 2,500–3,000 psi speeding the job considerably. For mold or mildew, CR advises lower pressure combined with pretreating rather than blasting at full power.
Concrete Network recommends a pressure suitable for thorough concrete cleaning and points out that flow rate (GPM) is just as important as pressure. PSI loosens grime; GPM flushes it away. Higher GPM shortens cleaning time on large flat areas, with higher GPM flow rates preferred for big driveways.
PSI and GPM quick reference
Nozzle types for concrete
- 25-degree (green) nozzle: The go-to for general concrete cleaning. Wide enough to cover ground quickly, focused enough to cut through grime.
- 15-degree (yellow) nozzle: For stubborn stains and spot work. Use with care; it concentrates force and can etch if held too close.
- Rotary/turbo nozzle: Spins a zero-degree stream in a circular pattern, combining the power of a narrow nozzle with broader coverage. Effective on heavy deposits.
- 40-degree (white) nozzle: Too wide for most concrete cleaning; better for rinsing.
Surface cleaner vs. wand
A surface cleaner attachment spins two or more nozzles under a shroud at a consistent standoff from the surface. Greenworks notes that surface cleaners reduce streaking on flatwork compared with a hand-held wand, and professionals prefer them for exactly that reason. For large driveways or patios, a surface cleaner cuts cleaning time significantly and produces a more even finish. Switch to the wand for edges, corners, and spot stain work where the attachment can’t reach.
Pro Tip: When using a detergent or degreaser, apply it with the machine in low-pressure soap mode or a separate pump sprayer, let it dwell for 3–5 minutes, and never let it dry on the surface. A dried cleaner is harder to rinse and can leave its own residue. Re-wet the area if you need more dwell time.
How to prepare the area before you start
Skipping prep is where most homeowner jobs go sideways. A few minutes of setup prevents collateral damage and makes the cleaning itself faster.
- Sweep the surface to remove loose debris, leaves, and gravel. Pressure washing over debris just scatters it.
- Move vehicles, furniture, and fragile items well away from the work zone. Overspray travels farther than you expect.
- Cover or wet down nearby plants and shrubs. Detergent runoff can damage landscaping. The Home Depot’s prep guidance recommends rinsing plants before and after to dilute any chemical contact.
- Cover electrical outlets, light fixtures, and vents near the work area with plastic sheeting or tape.
- Close windows and doors on the adjacent structure.
- Put on your PPE: safety glasses or goggles, closed-toe shoes (ideally rubber-soled), and waterproof gloves.
- Run a test patch in a low-visibility corner at your planned pressure and nozzle. Adjust before committing to the full surface.
- Plan your wastewater path. If you’re using a detergent, check whether local ordinances restrict runoff into storm drains. Contain or redirect if needed, and consider safe cleaning product choices that are less harmful to landscaping and waterways.
Step-by-step technique for pressure washing concrete
- Connect and test your equipment. Attach the correct nozzle (start with the 25-degree), set your pressure washer to its lowest effective setting, and run water through the wand before pointing it at the surface.
- Apply detergent if needed. Use low-pressure soap mode or a separate sprayer. Work in manageable sections so the solution doesn’t dry before you rinse.
- Start about 18 inches from the surface. Move in gradually to roughly 12 inches as you gauge the cleaning effect. Closer than 6 inches on a standard driveway risks etching.
- Use steady, overlapping sweeping passes. Move the wand parallel to any visible concrete joints or pour lines. Overlap each pass by about 50% to avoid leaving dry strips between passes.
- Keep your speed consistent. Lingering in one spot concentrates pressure and can leave a visible mark. Think of it like mowing a lawn: steady pace, even coverage.
- Switch to the surface cleaner for large open areas. Walk at a steady pace, overlapping each pass slightly. Use the wand to clean edges, expansion joints, and corners the attachment can’t reach.
- Rinse thoroughly. Switch to a 40-degree nozzle or your widest setting and rinse from the high end of the surface toward the drain or street, pushing dirty water off the slab rather than back over clean areas.
- Inspect while still wet. Wet concrete shows stains and missed spots more clearly than dry. Re-treat any areas that need it before the surface dries.
Pro Tip: Tiger striping (alternating light and dark bands) usually means you changed your standoff distance mid-pass or your speed was inconsistent. If you see it developing, backtrack immediately with a consistent 12-inch standoff and even pace before the surface dries.
How to handle common concrete stains
Not every stain responds to plain water pressure. Here’s what actually works for the four most common offenders:
- Oil and grease: Apply a concrete degreaser and let it dwell for 5–10 minutes before pressure washing. Hot-water pressure washers lift oil more effectively because heat emulsifies the hydrocarbons. For deeply embedded oil that has soaked into the slab over years, a poultice treatment or professional extraction may be needed before pressure washing can finish the job.
- Mildew and mold: Lower your pressure to the 1,500–2,000 psi range and apply a biocide or mildew-specific cleaner first. Consumer Reports advises pretreating mold and mildew and cleaning at lower pressure to avoid unnecessary surface damage. Rinsing at high pressure without pretreating just scatters spores rather than killing them.
- Paint and graffiti: Pressure alone removes fresh or flaking paint reasonably well. Cured, bonded paint usually requires a chemical paint stripper applied before pressure washing. Using very high pressure to force off bonded paint risks etching the concrete underneath.
- Rust: Rust stains don’t respond to pressure or bleach. Use a dedicated oxalic-acid-based rust remover, allow the recommended dwell time, agitate with a stiff brush if needed, then rinse with the pressure washer.
Aftercare: sealing, how long results last, and cleaning frequency
A freshly pressure-washed driveway looks great, but the result won’t last forever without some follow-up.
Sealing is the single most effective way to extend the life of a clean. Wait at least 24–48 hours after pressure washing before applying a concrete sealer, longer in humid conditions. A penetrating sealer protects against oil absorption and moisture intrusion; a film-forming sealer adds a visible sheen and surface protection. Either way, the surface must be completely dry and free of residue before you apply.
A well-cleaned and sealed driveway typically holds its appearance for 1–3 years depending on traffic, shade, and climate. Shaded surfaces stay damp longer and grow mildew faster. Driveways with regular vehicle oil drips will need attention sooner.
For most residential driveways and patios, annual light cleaning and a biennial deep clean is a reasonable rhythm. High-traffic areas or surfaces under heavy tree cover may need attention more often.
On the environmental side: if you used a detergent, avoid letting soapy runoff flow directly into storm drains. Many municipalities restrict this. Biodegradable, phosphate-free cleaners reduce the impact, and you can redirect runoff to a grassy area where soil can filter it naturally.
Typical cost ranges and when to hire a professional
Driveway pressure washing typically runs roughly $0.30–$0.55 per square foot, with the final price driven by stain difficulty, surface size, pretreating requirements, and local labor rates. A standard two-car driveway of around 400–500 square feet would fall in the $120–$275 range at those rates, though heavily stained surfaces or those requiring hot-water equipment cost more.
Hire a professional when:
- The area is large enough that a rental unit and a full day of labor costs nearly as much as a pro
- Oil stains are deeply embedded and require hot-water equipment you don’t own
- The surface has a decorative finish, coating, or sealer that needs a specialist’s touch
- You’re dealing with vertical concrete, retaining walls, or surfaces near electrical panels
- Wastewater containment and disposal are required by local ordinance
Questions worth asking any contractor: Do you carry liability insurance? What PSI and GPM does your equipment run? Do you have hot-water capability? How do you handle wastewater and detergent runoff? Can you provide references for similar jobs?
Cost drivers at a glance:
- Stain type and severity (oil and rust cost more to treat)
- Total square footage
- Need for pretreating or specialty chemicals
- Hot-water vs. cold-water equipment
- Travel distance and local market rates
Common mistakes homeowners make, and how to fix them
Getting too close is the most common error. Six inches or less on a standard driveway concentrates enough force to etch the surface visibly. Start at 18 inches and move in only as needed.
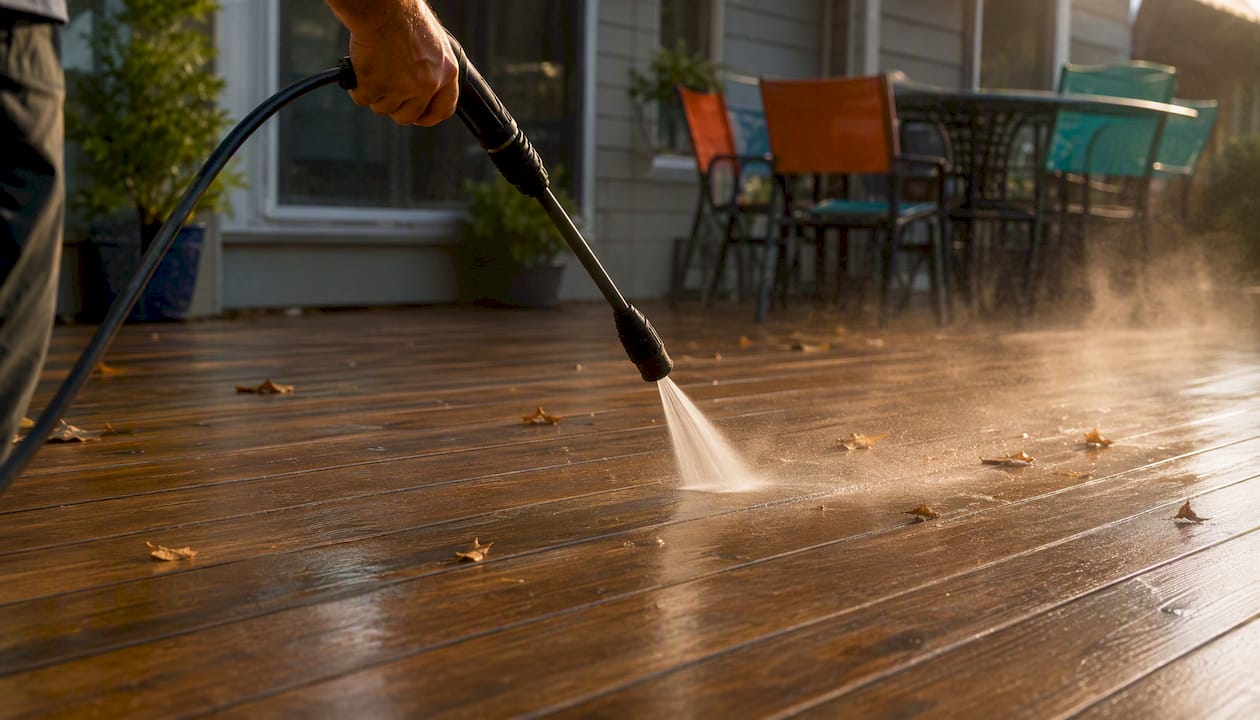
Using the wrong nozzle is a close second. A zero-degree (red) nozzle has almost no place in residential concrete cleaning; it concentrates all the machine’s force into a pinpoint and will gouge the surface.
Skipping the test patch means you discover the problem on a visible section of your driveway rather than a hidden corner.
Letting cleaning solution dry on the surface reduces its effectiveness and can leave a residue. Greenworks warns that dwell time must be managed carefully; re-wet the area rather than letting it sit too long.
The most expensive pressure washing mistake isn’t buying the wrong machine. It’s using the right machine at the wrong distance on the wrong surface — and discovering the damage only after the concrete dries.
If you cause light etching: stop immediately, document the area with photos, and let the surface dry fully before assessing the extent. Light etching on a non-decorative driveway is mostly cosmetic; deeper gouging may need a concrete resurfacer or professional repair.
On electrical safety: never use an electric pressure washer in standing water, and keep the power cord away from the spray path. Avoid pressure washing near overhead power lines or exterior electrical panels.
What professional cleaners know that most guides skip
Most pressure washing guides focus on the machine settings and leave out the part that actually separates a clean result from a damaged one: reading the surface before you start. Concrete is not uniform. A driveway poured in sections may have slabs of different ages and densities sitting side by side. A section that was patched two years ago may be softer than the original pour. A decorative border may have a thin surface coating that looks identical to plain concrete but will peel under 3,000 psi.
The test patch isn’t a formality. It’s how you find out which of those situations you’re dealing with before you’ve committed to a full pass. Professionals do it automatically, even on surfaces they’ve cleaned before, because concrete changes over time.
The other thing worth saying plainly: for large driveways, deeply stained surfaces, or any concrete near a building foundation, the cost of a professional job is often lower than the cost of repairing DIY damage. Neatandtidypros handles post-construction cleaning and exterior property maintenance across Orange County and Corona, California. If the job is beyond what a rental unit and a weekend can handle, that’s exactly the kind of situation where a professional crew with the right equipment pays for itself.
Sources
- Can You Pressure-Wash It? – Consumer Reports
- How to Pressure Wash Concrete Patios, Driveways & More – Concrete Network
- When can you pressure wash new concrete? | Hotsy Water Blast
- How to Pressure Wash Concrete: A Greenworks Guide
- Cleaning Concrete with a Pressure Washer