
Do these four things before a single box comes through the door: scrub the bathrooms, sanitize kitchen appliances, replace the HVAC filter, and walk every room with fresh eyes. Those four tasks catch the grime and germs that linger from previous occupants, contractors, or months of vacancy, and they take priority over everything else on a move-in cleaning checklist. A printable version of the full checklist below breaks the work into rooms with time estimates, so you can hand sections to helpers or knock it out solo the day before your move.
Here’s the priority order, before we get into the details of each room:
- Disinfect toilets, sinks, and shower surfaces in every bathroom
- Wipe down and sanitize the refrigerator, oven, and dishwasher interiors
- Replace the HVAC filter and wipe down vent covers
- Vacuum and mop all flooring, starting with high-traffic areas
- Wipe inside every kitchen cabinet and drawer before storing dishes
- Clean windows, sills, and tracks in bedrooms and living spaces
- Run an empty cycle in the washing machine and wipe the dryer drum
- Test smoke and carbon monoxide detectors
The ideal window for this work is the day before move-in or the morning of, while the home is still empty. If your schedule allows only a few hours, tackle bathrooms and the kitchen first since top-ranked checklists consistently prioritize those two spaces for odor and hygiene reasons. If you have more flexibility, spreading the work across two or three sessions in the week before moving day produces a more thorough result without the last-minute scramble.
Key Takeaways
A thorough move-in cleaning checklist prioritizes bathrooms and kitchen appliances first, replaces the HVAC filter, and works top to bottom through every room before boxes arrive.
| Point | Details |
|---|---|
| Start with bathrooms and kitchen | These two spaces carry the most bacteria and odor risk, so clean them before anything else. |
| Replace the HVAC filter | A fresh filter and clean vent covers noticeably improve air quality from day one. |
| Steam clean worn carpets | Do this before furniture arrives since it’s far harder to schedule once the home is full. |
| Hire pros for heavy jobs | Construction residue, pet damage, or tight timelines are good reasons to book a professional clean. |
| Use a printable, room-based checklist | Print or copy the checklist above and check off tasks by room, ideally with time estimates built in. |
| Neatandtidypros covers the full scope | Their move-in cleaning service handles cabinets, appliances, vents, and carpets when DIY time runs short. |
Table of Contents
- Before You Start: Walkthrough, Access, and a Realistic Timeline
- Cleaning Supplies and Tools to Gather Before You Start
- Room-by-Room Cleaning Checklist for Your New Home
- When a Deep Clean or Professional Move-In Clean Makes Sense
- Printable Checklist and Sample Cleaning Schedules
- Commonly Forgotten Spots and Your Final Walkthrough
- A Cleaner’s Perspective on What Actually Matters First
- Let Neatandtidypros Handle the Parts That Eat Your Moving Week
- Sources
Before You Start: Walkthrough, Access, and a Realistic Timeline
Walk the empty house before you touch a sponge. An empty room shows you scuffed baseboards, sticky cabinet interiors, and dust buildup that furniture would otherwise hide. Take photos of every room, including closets and closet shelving, before you clean and again after. That documentation protects you if a landlord or seller disputes the property’s condition later, a practice move-out inspection guides recommend for exactly this reason.
While you’re walking through, locate the breaker panel, the main water shutoff, and the gas shutoff if the home has gas appliances. Test every smoke and carbon monoxide detector, and swap batteries even if the previous owner claims they’re fresh. You don’t know how long those batteries have actually been in there.
Choose your timeline based on your situation. A single focused day works if the home is small or was already professionally cleaned before you got the keys. A two to three session plan, spread across the week before your move, works better for larger homes or ones that need real deep cleaning. Session one covers kitchen and bathrooms, session two covers bedrooms and living spaces, and a final short session handles floors and any spot you missed.
Basic safety matters more than most people expect once the cleaning supplies come out. Open windows when using bleach-based or ammonia-based products, since mixing chemical fumes in a closed space causes real harm. Wear gloves for anything involving disinfectants, and use a stable step stool rather than balancing on a kitchen chair to reach light fixtures.
Pro Tip: Crack a window in every room where you’re using a chemical cleaner, even in cooler weather. Cross ventilation clears fumes faster than a single open window and keeps headaches and irritation to a minimum during a long cleaning session.
Cleaning Supplies and Tools to Gather Before You Start
Nothing kills momentum like realizing halfway through the kitchen that you’re out of all-purpose cleaner. Gather everything before you start so you’re not making a mid-clean run to the store in your work clothes.
Core supplies for every room:
- Microfiber cloths (a dozen or more, since you’ll want clean ones for different surfaces)
- All-purpose cleaner and a disinfectant spray or wipes
- A mop and bucket, plus a vacuum with attachments for corners and edges
- Scrub brushes in at least two sizes, for grout and for general scrubbing
- Rubber gloves and a step stool
- Trash bags and a small caddy or bucket to carry supplies room to room
Room-specific extras worth picking up:
- Oven cleaner or a baking soda paste for stubborn baked-on residue
- A grout brush and grout cleaner for bathroom tile
- Wood floor soap formulated for your specific flooring, since general cleaners can dull the finish
- Glass cleaner for windows and mirrors
- A carpet steam cleaner, either rented or booked through a professional, if the carpets look worn or smell musty
Pro Tip: Buy microfiber cloths instead of paper towels for this job. They cost more upfront, but a dozen good microfiber cloths outlast hundreds of paper towel rolls and actually trap dust and bacteria rather than pushing them around the surface.
Room-by-Room Cleaning Checklist for Your New Home
Work from the top of each room down to the floor. Dust and debris fall as you clean, so hitting light fixtures and vents before you mop means you’re not redoing the floor twice. That order comes straight from professional cleaning guides, and it saves real time once you’re moving through six or seven rooms in one day.
Kitchen
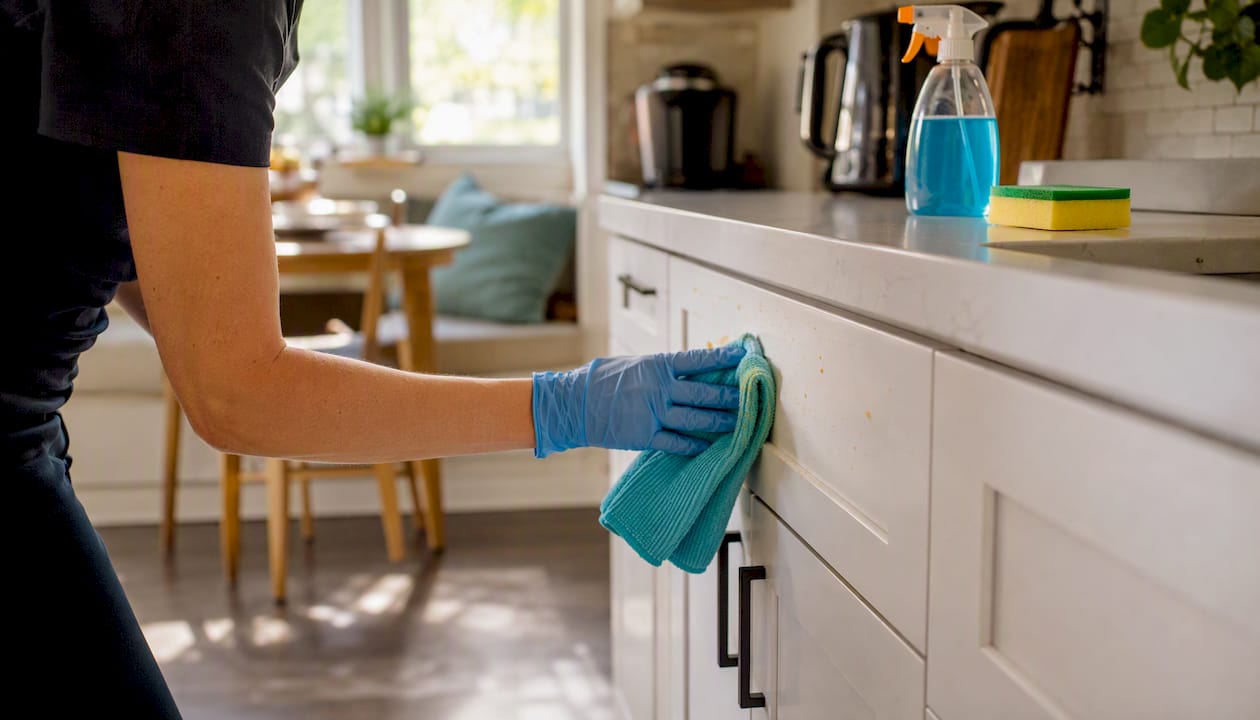
The kitchen is where previous occupants leave the most behind, from crumbs in drawer corners to grease film on cabinet doors. Wipe every cabinet and drawer inside and out before you put a single dish away. Pull the shelves out of the refrigerator and freezer and wash them in the sink, then wipe down the interior walls with a mix of warm water and baking soda to neutralize odors. Run the oven’s self-clean cycle if it has one, or scrub the interior by hand, and don’t skip the stovetop burners and drip pans. Run an empty cycle through the dishwasher with a dishwasher cleaner tablet before loading your first batch of dishes. Finish with the sink, garbage disposal, counters, backsplash, and floors, in that order.
Bathrooms
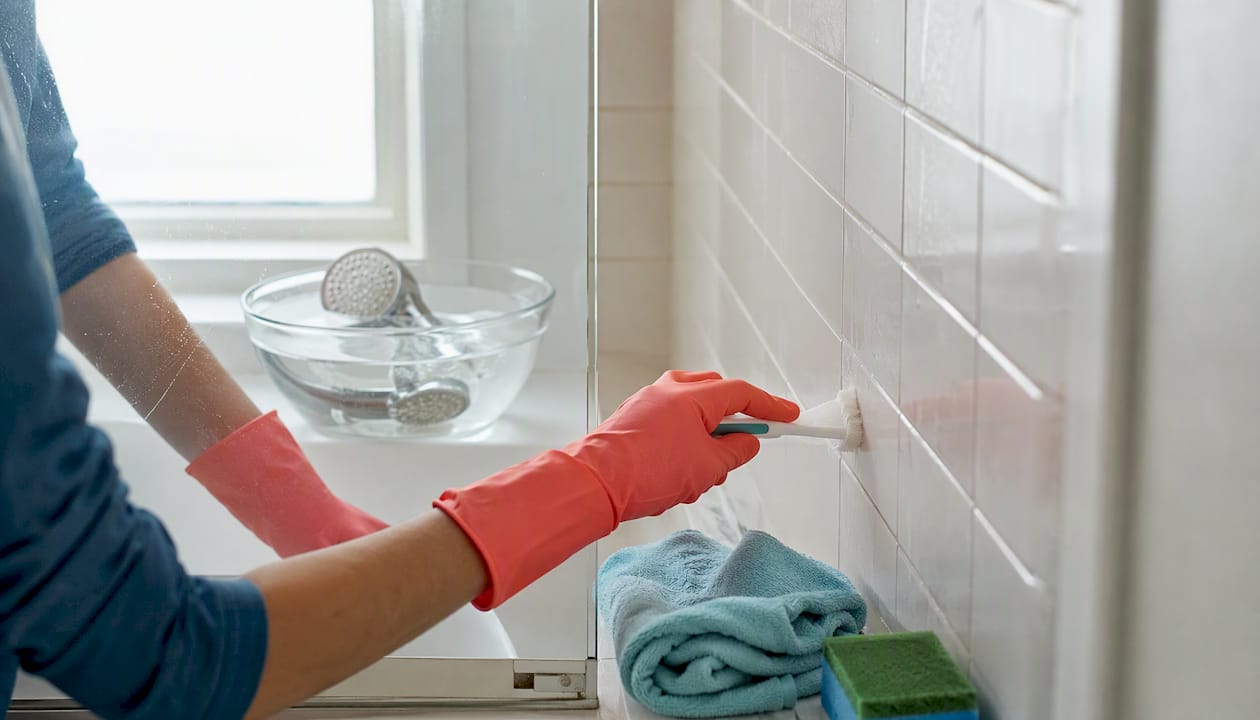
Disinfect every toilet, inside and out, along with the tank lid and handle. The CDC recommends following the product label directions and allowing the full contact time listed on your disinfectant for it to actually kill germs rather than just wipe them around. Descale showerheads by soaking them in a vinegar solution, then scrub grout lines in the shower and around the tub. Wipe out vanity drawers and cabinets, since these collect hair and dust even in homes that look spotless. Many movers choose to swap the shower liner and toilet seat outright rather than clean the previous owner’s.
Bedrooms and living areas
Clean windows and their tracks, which trap dead bugs and dust even in homes that were otherwise well kept. Wipe baseboards along every wall, a five-minute task per room that gets skipped constantly. Empty and wipe out every closet, including the shelf and rod, before hanging a single item. Dust light fixtures and ceiling fan blades, since fan blades in particular collect a surprising amount of grime that then blows around the room once the fan runs.
Floors and carpets
Vacuum edges and corners specifically, not just the open floor space, since dust and debris collect where flooring meets baseboard. Mop hard flooring with a cleaner suited to the material, since the wrong cleaner can strip a wood floor’s finish or leave residue on tile. If carpets look worn, smell musty, or came from a home with pets, steam cleaning before you move furniture in is worth the extra step. Once furniture and boxes are in place, that option disappears until your next move.
Laundry, entry, and garage
Wipe down the washer drum and run an empty cycle with a washing machine cleaner, then wipe the dryer drum and clean the lint trap housing, not just the removable screen. Check behind and underneath large appliances for dust buildup and debris the previous owner never saw. In the entry and garage, sweep and mop or hose down the floor, wipe light switch plates, and check for cobwebs in corners and near light fixtures.
When a Deep Clean or Professional Move-In Clean Makes Sense
DIY works fine for a home that was already reasonably maintained and where you have a full day or two to dedicate to the work. Hiring a professional makes more sense once you hit any of these situations:
- You’re working with a tight moving timeline and can’t spare a full day for cleaning
- The home shows construction residue, drywall dust, or paint overspray from recent renovations
- Previous occupants had pets and the carpets or air ducts need real attention
- Someone in your household has allergies or asthma, where deep-set dust and pet dander matter more than they would otherwise
- You don’t own or want to rent equipment like a carpet steam cleaner or a floor buffer
A professional move-in clean typically goes further than a standard tidy up. It includes cabinet interiors, full appliance interior cleaning, steam carpet cleaning, vent cleaning, and a dryer vent inspection, along with grout work that takes hours to do properly by hand. Neatandtidypros’ room-by-room cleaning coverage outlines exactly which surfaces get attention in each space during a professional visit.
Pricing depends on square footage, the number of bathrooms and kitchens, and any add-ons like oven cleaning, window washing, or carpet treatment. Published pricing guides show deep-clean costs scale directly with home size and requested services, which is exactly why an itemized estimate matters more than a flat quote. Ask any company for a line-by-line breakdown before you book, so you know what’s included and what counts as an add-on.
Pro Tip: Schedule your professional clean before movers arrive, not after. Cleaning around furniture and boxes takes longer and misses spots the movers’ path covers, so the empty house is genuinely the easier and faster job.
Printable Checklist and Sample Cleaning Schedules
A printable, room-organized checklist keeps you from mentally re-deriving the task list room by room, especially useful if you’re splitting the work with a partner, roommate, or family member. Copy this format onto paper or a notes app and check off tasks as you go:
Kitchen: cabinets/drawers, fridge/freezer interior, oven/stovetop, dishwasher cycle, sink/disposal, counters, floors
Bathrooms: toilet, shower/tub, showerhead descale, grout, vanity interior, mirror, floor
Bedrooms: windows/tracks, baseboards, closet interior, light fixtures, floor
Living areas: windows, baseboards, ceiling fan, floor
Laundry: washer/dryer interior, lint trap housing, floor
Entry/garage: switch plates, floor, cobwebs
One-day schedule (before move-in): Start with bathrooms first thing in the morning since you’ll likely need to use one, then move to the kitchen, bedrooms, living areas, and finish with floors throughout the house in the afternoon.
Two to three session plan: Session one, several days out, covers kitchen and bathrooms. Session two, a day or two later, covers bedrooms, living areas, and laundry. Session three, the morning of or the night before move-in, covers all flooring and a final walkthrough.
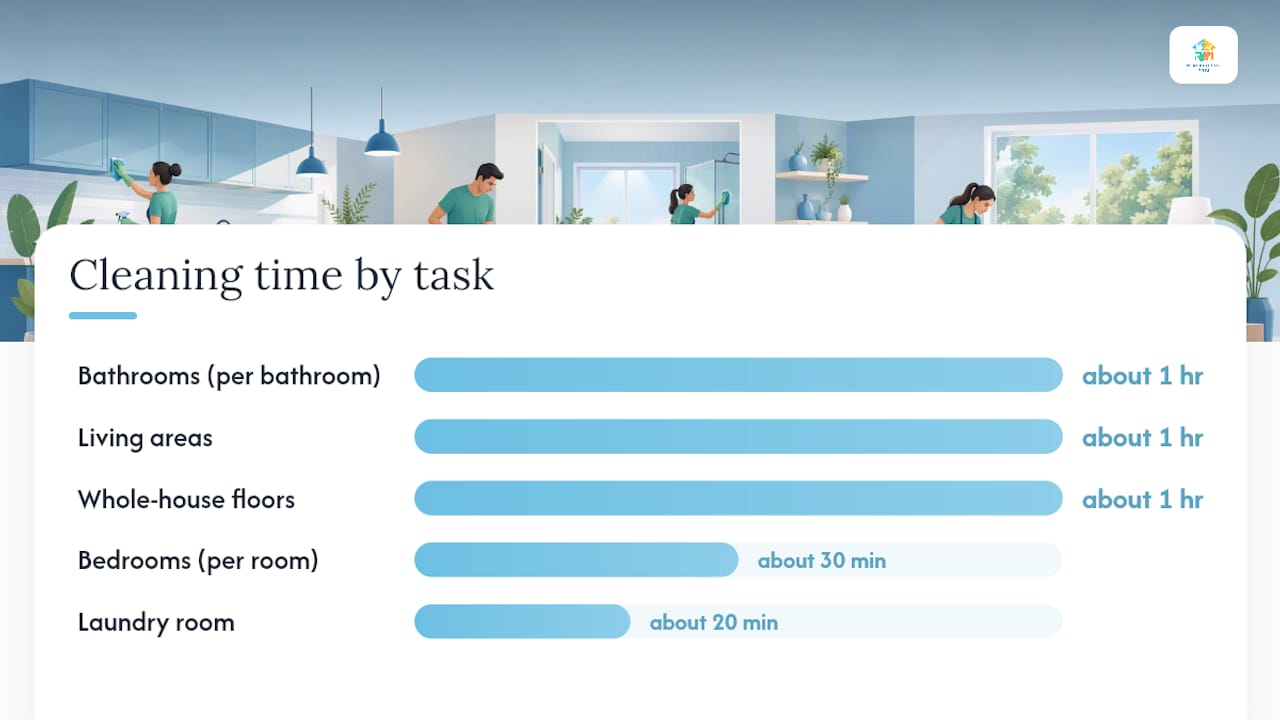
| Room or task | Estimated time |
|---|---|
| Kitchen (cabinets, appliances, counters) | several hours |
| Bathrooms (per bathroom) | about an hour |
| Bedrooms (per room) | about half an hour |
| Living areas | about an hour |
| Laundry room | about twenty minutes |
| Whole-house floors (vacuum and mop) | about an hour |
Commonly Forgotten Spots and Your Final Walkthrough
Before you call the job done, walk the house one more time with a short checklist in hand. Confirm every smoke and carbon monoxide detector works, check behind and under appliances for anything the movers or previous owner left, open the bottoms of cabinets to check for crumbs or spills, and inspect window tracks for dirt you may have missed the first pass. Confirm the HVAC filter is replaced and that vent covers throughout the house are wiped clean, a step move-in guides frequently flag as commonly skipped despite its direct effect on indoor air quality.
Certain spots get missed in almost every move-in clean, professional or DIY:
- Baseboards along walls where furniture will eventually sit
- Door jambs and the tops of door frames
- The garbage disposal, which traps odors even when the sink looks clean
- The top of the refrigerator, invisible from normal standing height
- Light switch plates and outlet covers throughout the house
- The tops of closet shelving
Pro Tip: Walk the finished house with your phone camera and take timestamped photos room by room. You’ll have a clean record of the home’s move-in condition, useful for security deposit disputes or simply for your own peace of mind six months later.
A Cleaner’s Perspective on What Actually Matters First
Professional cleaners don’t start where most people expect. Speed and contamination control drive the order of operations more than any checklist logic, which is why bathrooms come before kitchens on almost every professional job, not because bathrooms are dirtier, but because they’re needed sooner and cross-contamination from a dirty bathroom is worse than from a dirty countertop.
Most crews also keep a small “repair kit” in their supply caddy: a screwdriver, extra light bulbs, and a few adhesive hooks. Cleaning an empty house surfaces small problems constantly, a loose cabinet hinge, a burned-out bulb in a closet, a towel bar hanging by one screw, and fixing it in the moment beats adding it to a growing list you’ll forget by week two.
The biggest gap between a rushed clean and a thorough one isn’t effort. It’s sequencing. Cleaners who work top to bottom, room to room, in a fixed order finish faster and catch more than cleaners who bounce between rooms chasing whatever looks dirtiest at the moment.
Let Neatandtidypros Handle the Parts That Eat Your Moving Week
Every task on this checklist takes real time, and moving week rarely has any to spare. Neatandtidypros’ move-in and move-out cleaning service covers the exact scope outlined above: cabinet interiors, full appliance cleaning inside and out, vent wipe downs, and carpet attention where needed, all handled before your boxes arrive rather than around them.

The service uses eco-friendly products throughout, which matters if you have kids, pets, or anyone in the household sensitive to strong chemical residue. DIY still makes sense for a smaller apartment or a home that was already in decent shape. Professional help earns its cost when you’re short on time, the home has construction dust or heavy pet residue, or you’d simply rather spend moving week unpacking than scrubbing an oven. For a full breakdown of what’s included and add-on options like carpet steam cleaning or window washing, check Neatandtidypros’ full move-in cleaning guide or request a quote through the services page to get a session booked before your moving date.
Sources
- Disinfection and sterilization guidelines — chemical methods | CDC
- How to Clean a New Home | The Spruce
- Ultimate Move-In Cleaning Checklist For Your New Home | Extra Space Storage
- Move-In Cleaning Checklist — Free Customizable Tool + Printable PDF | 101planners
- How Much to Charge for House Cleaning: 2025 Pricing Guide | FreshBooks
One Response