The safest approach is simple: clean with baking soda, diluted white vinegar, mild unscented soap, and enzyme cleaners for organic messes, and skip bleach, ammonia, and phenol-based products entirely. Ventilate the room, keep pets out while you work, and don’t let them back in until every surface is completely dry. Pet safe cleaning isn’t about buying an expensive specialty line. It’s about knowing which four or five ingredients do the job without putting your dog or cat at risk.
TL;DR:
- Baking soda, diluted vinegar, unscented dish soap, and hydrogen peroxide are effective and safe for most household cleaning tasks around pets.
- Avoid using bleach, ammonia, phenol-based cleaners, isopropyl alcohol, and certain essential oils due to their toxicity risks to animals.
- Enzyme cleaners outperform traditional disinfectants for pet stains and odors, eliminating smell at the molecular level rather than masking it.
- Proper ventilation, pet exclusion during cleaning, and drying surfaces fully are critical steps to prevent accidental poisoning.
- Professional deep cleaning with pet-safe products is recommended for ingrained pet odors, heavy soiling, or post-construction residue that DIY methods cannot fully resolve.
Table of Contents
- Quick Safety Checklist: Safe Ingredients Versus Ingredients to Avoid
- DIY Pet-Safe Cleaner Recipes for Common Household Tasks
- Treating Pet Stains and Odors: Why Enzyme Cleaners Usually Work Best
- Cleaning Versus Disinfecting: When to Disinfect and How to Do It Safely
- Practical Safety Steps and Emergency Actions if a Pet Is Exposed
- How Pet-Safe Cleaning Cuts Down on Household Allergens
- How to Choose Commercial Pet-Safe Cleaning Products
- Frequency and Best Practices for Cleaning Pet Areas
- Comparison of Pet-Safe Cleaning Efficacy Versus Traditional Cleaners
- What Professional Cleaners Do Differently to Keep Pets Safe
- Book a Pet-Safe Clean With Neat and Tidy Pros
- Sources
Quick Safety Checklist: Safe Ingredients Versus Ingredients to Avoid
You don’t need a chemistry degree to clean safely around animals. You need to know which bottles under your sink are fine and which ones belong in a locked cabinet.
Safe to use, with a few caveats:
- Baking soda — great for absorbing odors and light scrubbing on carpet, fabric, and hard surfaces.
- White vinegar, diluted 1:1 with water — a solid general cleaner, though it can etch natural stone like marble or granite, so skip it there.
- Mild, unscented dish soap — cuts grease on stovetops and floors without leaving a chemical residue.
- Diluted hydrogen peroxide (3%) — useful as a spot treatment, but it bleaches fabric, so test an inconspicuous area first.
Avoid these outright:
- Bleach and ammonia — both release fumes that irritate a pet’s respiratory tract, and mixing them by accident creates toxic gas.
- Phenol-based cleaners (common in some pine and disinfectant products) — cats in particular lack the liver enzymes to process phenols safely.
- Isopropyl alcohol — absorbs through skin and paw pads faster than most owners realize.
- Many essential oils, especially tea tree, citrus, and pine — small amounts can cause vomiting, tremors, or liver stress in cats.
Household cleaners are a recurring category in pet poisoning calls, and ingredients like bleach, ammonia, and phenols show up again and again in those reports. If you’ve just cleaned with anything on the avoid list, ventilate the space, keep your pet in another room, and don’t let them back in until the surface is fully dry and any odor has cleared.
DIY Pet-Safe Cleaner Recipes for Common Household Tasks
You can cover nearly every routine cleaning task in your house with four ingredients you already own. Here’s how to mix them correctly.
- All-purpose spray: Combine equal parts water and white vinegar in a spray bottle. It works on countertops, glass, and most sealed floors. Skip it on natural stone. Diluted vinegar is one of the most versatile pantry cleaners for pet households, since it doesn’t leave the chemical residue that scented commercial sprays do.
- Mild degreaser: Mix a few drops of unscented dish soap into warm water for stovetops and appliance exteriors. Wipe with a damp cloth afterward to remove any soapy film, since residue is what pets actually lick or step in.
- Baking soda paste: Combine baking soda with a small amount of water to form a paste for scrubbing stains on tile or countertops. Let it sit for a few minutes, scrub gently, then rinse fully so no gritty residue remains.
- Carpet spot-cleaner: Mix 3% hydrogen peroxide with a sprinkle of baking soda for a set-in stain. Spot-test on a hidden patch of carpet first, since peroxide can lighten dyed fibers. For anything organic (urine, vomit), an enzyme cleaner works better than peroxide alone.
- Natural scenting option: Simmer citrus peels in water for a light, non-toxic scent boost. Never add essential oils to any DIY blend meant for pet-occupied rooms, even “pet safe” labeled ones, unless you’ve confirmed the specific oil and dilution with your vet.
Pro Tip: Keep a labeled spray bottle for each recipe. Mixing leftover vinegar solution with a peroxide-based one, even unintentionally, can create a reaction you don’t want happening near a curious dog’s nose.
Treating Pet Stains and Odors: Why Enzyme Cleaners Usually Work Best
Scented sprays cover up a urine smell. Enzyme cleaners get rid of it. That distinction matters more than most pet owners realize, because a pet that can still smell its own mark on the carpet is more likely to return to that exact spot.
Enzyme-based formulas contain bacterial cultures that break down the proteins in urine, vomit, and feces at a molecular level, eliminating the odor source rather than masking it with fragrance. That’s the mechanism fragrance sprays can’t replicate.
Use enzyme cleaners for:
- Urine on carpet, upholstery, or hardwood
- Vomit and bile stains
- Fecal residue on flooring or fabric
- Drool stains on furniture
The application matters as much as the product. Blot up as much of the mess as possible first, apply the enzyme cleaner generously enough to reach the same depth the mess soaked into, let it sit for the time the label specifies (often 10 to 15 minutes, sometimes longer for old stains), then blot dry. Don’t scrub during the wait time. Scrubbing spreads the stain before the enzymes finish working.
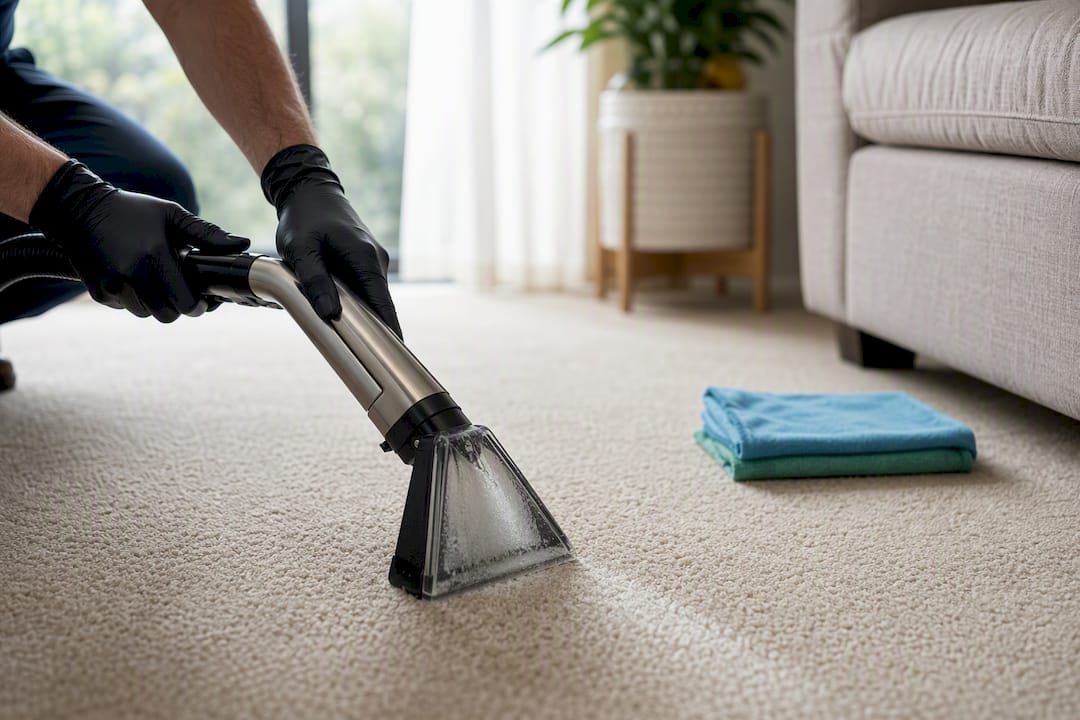
For stains that have been sitting for weeks or worked deep into carpet padding, enzyme cleaner alone may not fully reach the source. That’s when steam extraction or professional deep cleaning becomes worth the cost, since it pulls contaminants out of the padding layer that surface treatment can’t touch.
Cleaning Versus Disinfecting: When to Disinfect and How to Do It Safely
Cleaning removes visible dirt and grime. Disinfecting kills or reduces the pathogens you can’t see. Wiping up a spilled drink is cleaning. Treating a spot where a sick pet vomited or had diarrhea calls for disinfecting, because certain gastrointestinal illnesses are contagious between pets and, in some cases, to people.
Everyday cleaning is enough for dust, food crumbs, and general grime. Disinfection becomes necessary after illness, exposure to raw meat or animal waste, or when a vet has flagged a contagious condition in your household.
When disinfecting is called for:
- Choose an EPA-registered disinfectant rather than a random multipurpose spray.
- Follow the label’s dilution ratio and dwell time exactly. Wiping it off too soon means it never actually killed anything.
- Keep pets out of the room until the dwell time passes and the surface has dried.
- Ventilate the space during and after application, and rinse if the label instructs you to.
Practical Safety Steps and Emergency Actions if a Pet Is Exposed
Most pet cleaning incidents come down to timing, not ingredients. A perfectly safe product used while your dog is standing in the room, or before a surface has dried, can still cause a problem.
- Store all cleaning products locked away, ideally on a shelf a cat can’t jump to.
- Ventilate the room and keep pets in a separate space while you clean and while surfaces dry.
- Never decant cleaner into an unlabeled container, especially anything that resembles a food or water dish.
- Spot-test any new product on a small area first, and read the label fully before first use.
- Wait until surfaces are visibly dry before letting pets back in. Wet residue, not the cleaning itself, is usually what causes exposure.
If exposure happens anyway: remove your pet from the area immediately, wipe off any visible residue from fur or paws if it’s safe to touch, and call Pet Poison Helpline at 855-764-7661 or the ASPCA Animal Poison Control Center at 888-426-4435. Have the product label ready when you call, and follow up with your vet right away if your pet shows drooling, vomiting, lethargy, or trouble breathing.
Pro Tip: Snap a photo of the product label before you throw the bottle away. If your pet does get exposed, that photo saves precious minutes on the phone with poison control.
How Pet-Safe Cleaning Cuts Down on Household Allergens
Switching to non-toxic cleaning products does more than protect your pet from chemical exposure. It often reduces the allergens circulating through your home, including the ones your pet stirs up just by living there.
Dust mites thrive in carpet fibers, pet bedding, and upholstery, and pet dander adds another layer of allergen on top of that. Harsh chemical cleaners don’t actually address either problem. They kill surface bacteria but leave dust and dander embedded in fabric. Regular vacuuming with a HEPA filter, combined with baking soda treatments on carpet and upholstery, physically lifts dander and dust mite debris out of fibers instead of just masking the smell.
Vinegar-based cleaning on hard floors and window sills also helps by breaking down the sticky residue that traps pollen and dust brought in on paws and fur. Because ammonia and bleach can irritate airways in both pets and allergy-prone people, swapping to gentler agents removes one more airborne irritant from a room that already has dander in it. If anyone in the house has asthma or pet allergies, pairing pet-safe cleaning products with frequent washing of pet bedding and regular grooming makes a bigger difference than any single “hypoallergenic” spray on the market.
How to Choose Commercial Pet-Safe Cleaning Products
Labels reading “pet safe” or “non-toxic” carry no single, standardized legal definition. A product can print that phrase on the front and still contain ingredients that cause stomach upset if a pet licks a damp floor. The label “non-toxic” is a marketing term, not a regulated one, so the ingredient list matters more than the front-of-bottle claim.
What actually tells you something useful:
| Look for | What it means |
|---|---|
| Full ingredient list on the label or website | Lets you check against the avoid list (bleach, ammonia, phenols) |
| EPA registration number (for disinfectants) | Confirms the product meets federal efficacy and safety review |
| Fragrance-free or “no added fragrance” | Fewer volatile compounds released into the air pets breathe |
| Biodegradable or plant-derived surfactants | Generally lower toxicity risk if licked or walked through |
Skip products that only say “natural” or “green” without backing it up with an ingredient list. Those words aren’t regulated either. If a company won’t disclose what’s in the bottle, that’s a reasonable reason to choose a different one.
Frequency and Best Practices for Cleaning Pet Areas
Pet bedding, litter boxes, and food bowls build up bacteria and odor faster than most other spots in the house, and the right cleaning frequency depends on the item, not a one-size-fits-all weekly routine.
Wash food and water bowls daily with mild soap and hot water. Bacteria from saliva and wet food builds a film within 24 hours that plain rinsing doesn’t remove. Litter boxes need scooping daily and a full wash with unscented soap weekly, since ammonia from urine accumulates fast in an enclosed box and can affect a cat’s respiratory comfort. Wash pet bedding weekly in hot water, using an unscented, dye-free detergent. Vacuum carpet and upholstered furniture at least twice a week if pets spend most of their time indoors, since dander and loose fur settle into fibers between vacuuming sessions. Wipe down leashes, collars, and toys with a vinegar solution every couple of weeks, since these items collect saliva and outdoor grime that regular washing misses.
Sticking to a schedule matters more than any single deep clean. Odor and bacteria buildup happen gradually, and catching it early with light, frequent cleaning beats a big scrub-down after the smell is already noticeable.
Comparison of Pet-Safe Cleaning Efficacy Versus Traditional Cleaners
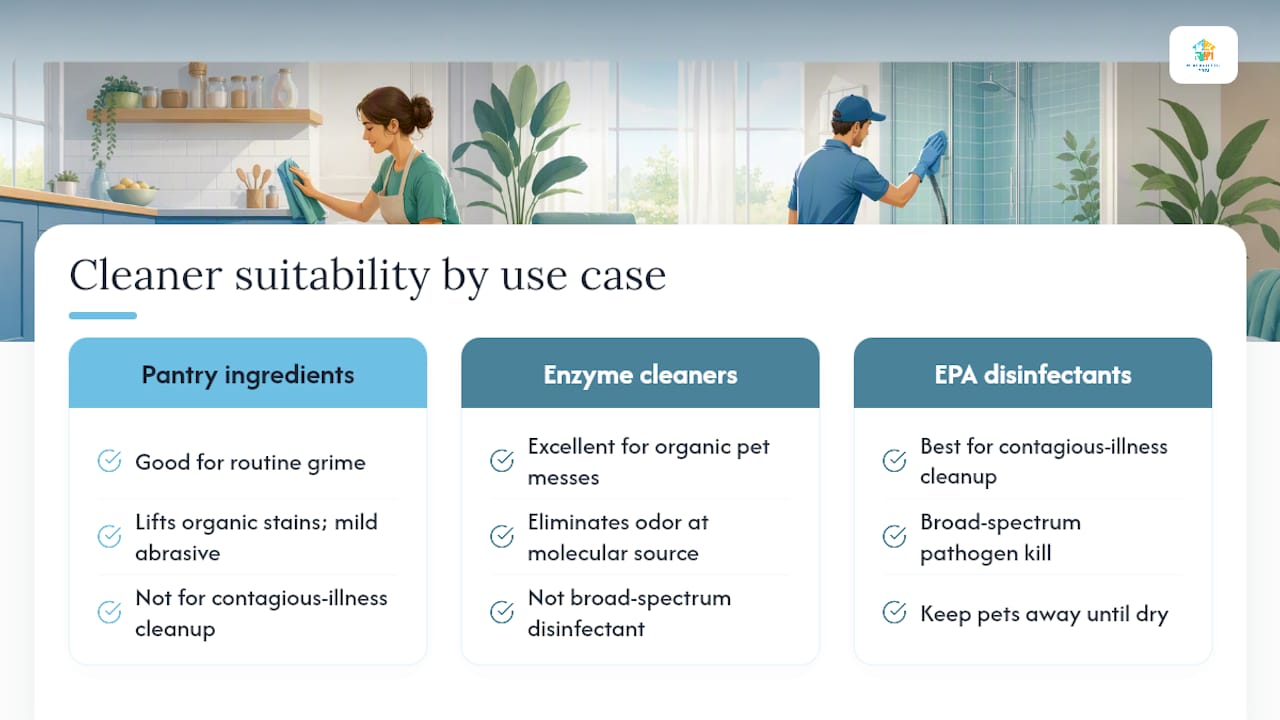
The honest answer: pet-safe cleaning holds up well for routine cleaning and organic stains, but it’s not always a one-to-one swap for every job a harsh chemical does.
For everyday grime, grease, and general surfaces, diluted vinegar and mild soap clean about as effectively as their conventional counterparts. Vinegar’s acetic acid is genuinely effective against some bacteria, and baking soda’s mild abrasiveness lifts stains without scratching most surfaces. For organic pet messes specifically, enzyme cleaners actually outperform traditional bleach-based products, since bleach masks odor temporarily while enzymes eliminate it at the molecular source.
Where traditional chemical disinfectants still have an edge is in situations demanding broad-spectrum pathogen kill, like cleanup after a contagious illness. That’s a case where an EPA-registered disinfectant, used correctly and with pets kept away until it’s dry, does a job that vinegar simply can’t match. The realistic takeaway isn’t “natural always wins” or “chemicals always win.” It’s matching the method to the task: pantry ingredients and enzymes for daily life and pet messes, registered disinfectants for the occasions that genuinely call for them.
What Professional Cleaners Do Differently to Keep Pets Safe
Neatandtidypros builds pet safety into the product choices behind every job, not as an afterthought. That means excluding bleach, ammonia, and phenol-based products from standard rotations and reaching for enzyme treatments on set-in odor and stain jobs that a spray bottle at home won’t fully resolve.
Hiring a professional makes the biggest difference in specific situations: deep-set pet odor that’s worked into carpet padding, post-construction dust and residue in a home with pets already living there, or heavy soiling after a move-in or move-out where the previous occupant’s mess needs full extraction, not surface wiping. Those are the jobs where equipment and product knowledge outperform a bottle of vinegar.
— Neat
Book a Pet-Safe Clean With Neat and Tidy Pros
If your carpet has held onto a pet odor no amount of enzyme spray has fixed, or you’re moving into a home that needs a deep reset before your dog or cat sets a single paw inside, that’s exactly the gap a professional visit closes. Neatandtidypros builds every job around pet-safe product choices, with enzyme-based stain and odor treatment available for the messes that DIY methods can’t fully lift.

Booking works the same way for a one-time deep clean or a recurring visit: you tell us the rooms and concerns (litter areas, pet bedding zones, carpet stains), and our team brings the right products for the job instead of a generic all-purpose spray. Read how residential cleaning works to see what a booking actually includes, then get a quote for your space.
Sources
- Dog-Safe Cleaning Solutions You Can Mix At Home — AKC
- Cleaning products that can harm your pets — PetMD
- Enzyme Pet Stain & Odor Remover | Puracy
- EPA — U.S. Environmental Protection Agency
- ASPCA — Official top 10 toxins (2024)