
This move out cleaning checklist covers every point landlords and property managers actually inspect, so you spend your limited time where it counts. Work through it room by room, starting with the kitchen, and photograph everything as you go. Most tenants need a full weekend or more, depending on unit size and how deep the last deep clean went. Follow the timeline below and you will walk into your final inspection with proof, not just hope.
TL;DR:
- Landlords primarily check kitchen appliances, bathroom grout, floors, walls, windows, and closets for cleanliness and damage during move-out inspections.
- Thorough documentation, including a written checklist and dated photos, is crucial for protecting your deposit against disputes over wear and tear versus damage.
- Focus on appliance interiors, bathroom caulk and grout, carpet stains, wall scuffs, and hidden areas like behind appliances to meet expectations and avoid deductions.
- Booking professional cleaning two to three weeks before moving out ensures timely service, receipts, and compliance with lease-specific cleaning requirements.
- Combining DIY cleaning of accessible areas with professional services for high-risk zones balances cost and thoroughness, with receipts serving as proof against potential disputes.
Table of Contents
- What Do Landlords Actually Check Before Returning a Deposit?
- Kitchen Cleaning Checklist: Order Matters
- Bathroom Cleaning Checklist: Grout, Caulk, and Mineral Buildup
- Bedroom and Living Room Checklist: Floors, Closets, and Walls
- The Spots Everyone Forgets (and Landlords Always Find)
- What Supplies Do You Actually Need?
- When Should You Schedule Your Move-Out Cleaning?
- How to Document Your Move-Out for Deposit Protection
- How to Safely Dispose of Batteries, Paint, and Other Hazardous Waste
- Check Your Lease Before You Start Cleaning
- What Standard of Clean Do Landlords Actually Expect?
- DIY or Hire a Pro? Comparing the Real Costs
- Professional Cleaner Perspective: Three Insider Tips
- Book a Move-Out Clean With Neat and Tidy Pros
- Sources
What Do Landlords Actually Check Before Returning a Deposit?
Landlords aren’t inspecting your whole apartment with equal scrutiny. They’re working through a mental (or literal) list, and it’s the same handful of spots every time: appliance interiors, bathroom grout and mold, floors and carpets, walls and nail holes, windows and blinds, and closets and cabinets. Property managers focus their walkthroughs on these exact zones. This means a spotless living room won’t offset a greasy oven.
The tricky part is separating normal wear and tear from actual damage. A little carpet fading near a sunny window is wear. A wine stain ground into the fibers is damage. Nail holes from hanging a mirror are wear; a fist-sized hole in drywall is not. Landlords who understand this distinction rarely fight you on it, but plenty will try their luck if you show up with no evidence.
That’s where documentation becomes your leverage. A written checklist paired with dated photos is widely considered the single most effective way to protect a security deposit in a dispute.
Key inspection points to prioritize:
- Inside the oven, fridge, and microwave
- Bathroom grout, caulk lines, and exhaust fans
- Carpet stains and hard floor scuffs
- Nail holes, scuffs, and wall marks
- Window tracks, blinds, and closet interiors
- Vents, light fixtures, and cabinet interiors
Kitchen Cleaning Checklist: Order Matters
The kitchen is where most deposit disputes start, making adherence to appliance cleaning standards for rental properties essential. Landlords cite dirty appliance interiors and greasy surfaces more than any other single issue, which is why it deserves the most methodical approach on your entire move out cleaning list.
Work in this order to avoid redoing steps:
- Run the oven’s self-clean cycle, or scrub with a baking-soda-and-water paste left overnight for stuck-on grease.
- Pull out fridge drawers and shelves, wash them separately, then wipe the interior walls and gasket.
- Run an empty cycle in the dishwasher with a cleaning tablet, then hand-wipe the door seal and utensil basket.
- Degrease the stovetop, burner caps, and range hood filter (a soak in hot water and dish soap works better than spraying).
- Wipe the backsplash and clean inside every cabinet and drawer, including the pantry.
- If you can safely move it, pull the fridge and stove forward and sweep or vacuum behind and underneath them.
- Finish with counters, sink, and floors last, once nothing above will drip down and re-dirty them.
Handle small repairs while you’re already in the room: replace a burned-out bulb, tighten a loose cabinet handle, or swap a cracked outlet cover. These take two minutes and remove easy excuses for a deduction.
Pro Tip: Degrease the range hood filter before you tackle the stovetop. Grease drips downward as you scrub, so cleaning bottom-up means redoing your countertops twice.
Bathroom Cleaning Checklist: Grout, Caulk, and Mineral Buildup
Bathrooms fail inspections for one reason more than any other: mold and mineral buildup that’s been ignored for months, not just the last cleaning session. Grout lines and caulk seams show neglect fast, and they’re one of the first things a landlord checks with a flashlight.
Work through these tasks methodically:
- Scrub showers and tubs with a non-abrasive cleaner, then descale faucets and showerheads with a vinegar soak.
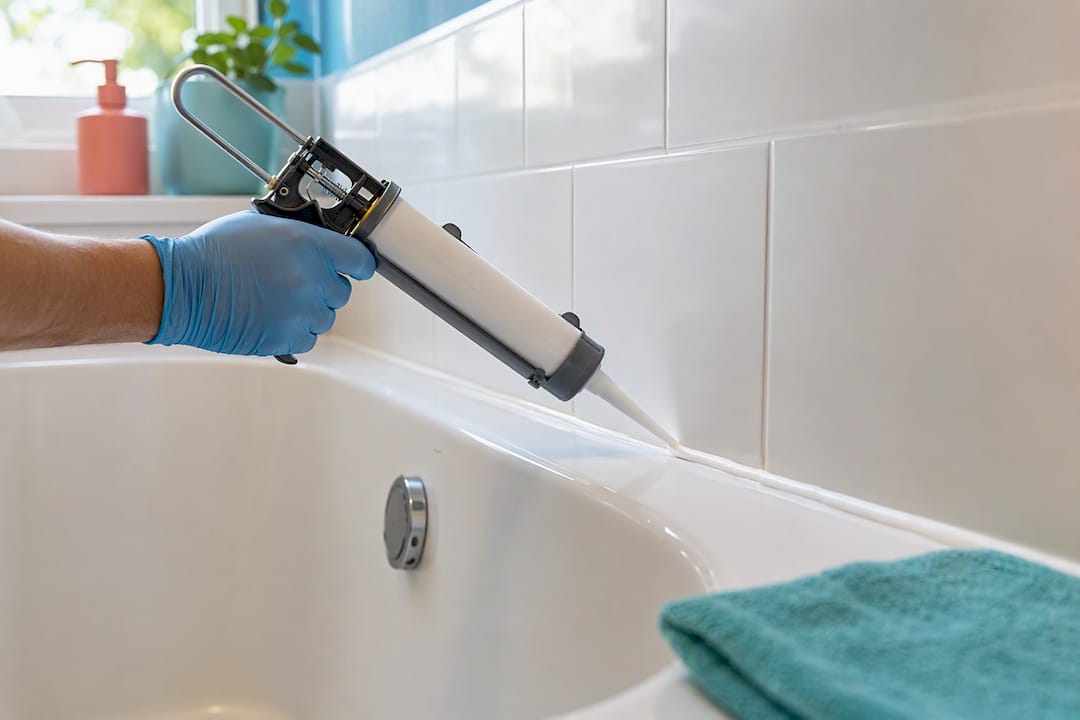
- Scrub grout with a stiff brush and a baking-soda paste; if caulk is moldy or peeling, remove and re-caulk rather than trying to bleach it clean.
- Remove and wash the exhaust fan cover, which collects dust that most tenants never touch.
- Disinfect the toilet inside and out, including the base and hinges, and replace the seat if it’s stained or cracked.
- Wipe down the mirror and clean inside the medicine cabinet, not just its exterior.
Hard-water stains respond best to an acidic cleaner (vinegar or a store-bought lime remover) left to sit for 10 to 15 minutes before scrubbing. Trying to power through mineral deposits with a dry scrub just wastes your arm strength.
Pro Tip: If caulk has any black mold in the seams, don’t just clean it. Replace it. A fresh bead of caulk costs a few dollars and photographs as new, which reads very differently to an inspector than bleached-but-still-discolored caulk.
Bedroom and Living Room Checklist: Floors, Closets, and Walls
Bedrooms and living areas get less scrutiny than kitchens and bathrooms, but carpet condition and wall damage are still common deduction triggers. Vacuum every carpet thoroughly, including under furniture you’ve already moved, and spot-treat any visible stains with an enzyme-based cleaner.
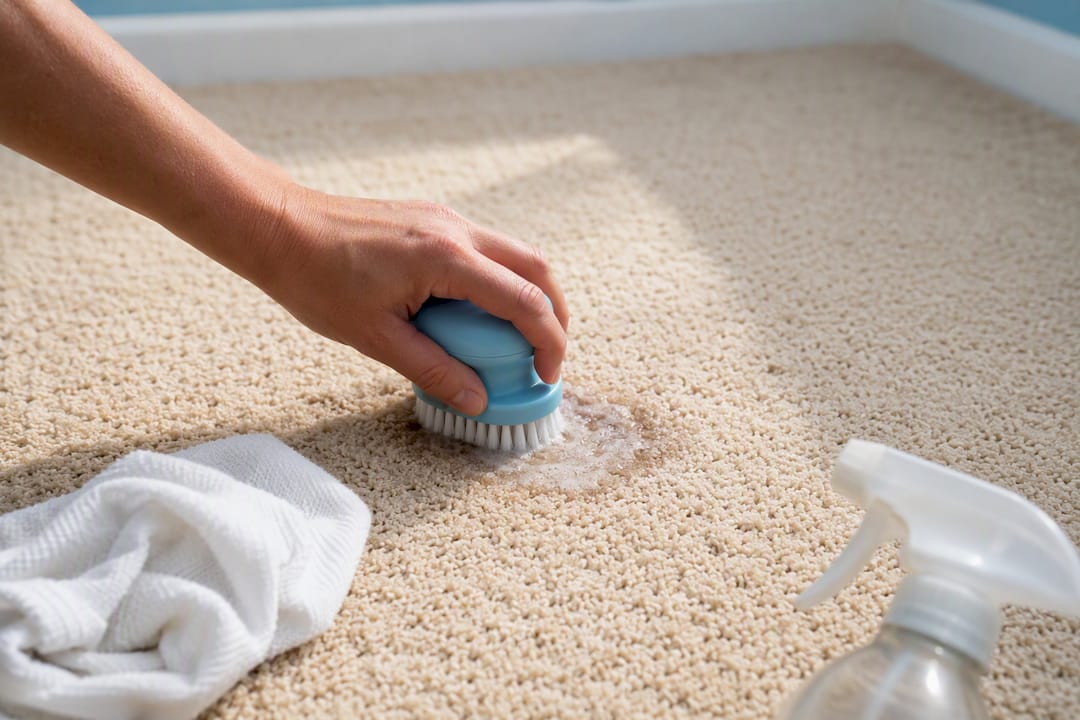
If the carpet needs more than spot treatment, get it professionally steam-cleaned and keep the receipt. That receipt often carries more weight with a landlord than the cleaning itself, since it proves you took the condition seriously.
Round out the rest of the space:
- Empty and wipe down every closet shelf and rod, including dust on the top shelf
- Dust ceiling fan blades and light fixtures
- Clean window tracks and wipe down or dust blinds slat by slat
- Sweep and mop hard flooring, paying attention to corners and baseboards
- Fill nail holes with spackle and touch up paint once it’s fully dry
A carpet-cleaning receipt is particularly useful when your lease specifically requires professional carpet cleaning at move-out, which many California leases do.
The Spots Everyone Forgets (and Landlords Always Find)
These are the small, easy-to-skip areas that quietly cost renters real money. None of them take long individually, but skipping all of them adds up fast during inspection.
- Pull the fridge and stove forward and sweep or vacuum behind them
- Wipe down every baseboard in the unit, not just the visible ones
- Clean vent covers and return air grilles, which collect visible dust buildup
- Replace HVAC filters if your lease makes you responsible for them
- Swap smoke detector batteries, even if they still work
- Return all copies of keys, garage remotes, and mailbox keys
- Treat any pet odors with an enzyme cleaner, not just air freshener, since masking odor doesn’t remove the source landlords will notice
What Supplies Do You Actually Need?
You don’t need a truck full of specialty products. A focused kit works better than a cluttered one: microfiber cloths, a degreaser, a magic eraser, a vacuum, a mop, spackle for nail holes, and matching touch-up paint.
A few techniques save real time. Vacuum before you scrub anything wet, since wet debris turns to paste. Clean top to bottom in every room so dust and drips land on surfaces you haven’t cleaned yet. Run appliance cleaning cycles (oven, dishwasher) while you tackle other rooms, and always schedule the deep clean after furniture is out, not before.
Specialty cleaners are worth the extra cost for pet stains, heavy grease buildup, or mold that’s spread beyond a small area. Trying to save $15 on an enzyme cleaner isn’t worth risking a much larger deduction later.
Pro Tip: Buy touch-up paint before move-out day, not after. Matching a wall color from memory at the hardware store almost never works, and a mismatched patch stands out more than the hole did.
When Should You Schedule Your Move-Out Cleaning?
Timing your clean around your actual move date, not your lease end date, prevents the most common mistake: cleaning too early and then messing the place up again while packing.
- 2 to 3 weeks before lease end: Book a professional cleaner if you’re hiring one. Slots fill fast at month-end when everyone in the building moves at once.
- 1 week before move-out: Tackle heavy tasks like appliance interiors, grout scrubbing, and carpet treatment.
- 1 to 2 days before handover: Do your final walkthrough, take photos, and clean anything disturbed by moving boxes and furniture out.
Hire a professional if you’re short on time, dealing with heavy grease or mold, or your lease specifically requires a professional cleaning receipt. A one-bedroom apartment typically takes 3 to 5 hours to deep clean thoroughly; a three-bedroom house can run 6 to 8 hours or more. Booking early avoids the scramble that leaves half the unit undone.
How to Document Your Move-Out for Deposit Protection
Photos and video are your best defense if a landlord disputes your deposit later. Work through this sequence the day you finish cleaning:
- Photograph or video every room, including inside the oven, fridge, and cabinets.
- Capture closets, vents, and any patched nail holes up close.
- Email the photos to yourself or upload them to cloud storage immediately, so they’re timestamped and backed up.
- Keep every receipt for professional services, whether it’s carpet cleaning or a full move-out clean.
- Request a pre-move-out walkthrough with your landlord and get any agreed-upon issues in writing.
A joint walkthrough, even an informal one, gives you a chance to fix small issues before they become deductions.
How to Safely Dispose of Batteries, Paint, and Other Hazardous Waste
You can’t just toss old batteries, half-used paint cans, or cleaning chemicals in the regular trash, and doing so can violate local waste ordinances in many areas. These items need to go through household hazardous waste disposal, which most counties offer through dedicated drop-off events or permanent collection sites.
Batteries, including the ones you just pulled from smoke detectors, should go to a battery recycling drop-off, often available at hardware stores and electronics retailers, not the trash can. Paint is trickier: if a can still has usable paint inside, some donation centers or community organizations accept it, especially if it matches a common wall color. If it’s dried out completely, many municipalities allow you to dispose of it as solid waste once solidified, but check your local rules first since this varies significantly by city.
Other common hazardous items from a move include:
- Aerosol cans (cleaning sprays, spray paint)
- Old cleaning chemicals, especially anything with bleach or ammonia
- Fluorescent bulbs and CFLs, which contain trace mercury
- Motor oil or automotive fluids from a garage or storage unit
Never mix chemicals together for disposal, even in a sealed container. Combining bleach-based and ammonia-based cleaners, for instance, produces toxic fumes. Check your city or county’s public works website for scheduled hazardous waste collection days, since many offer this service free of charge a few times a year. Planning this a few weeks ahead of your move avoids a last-minute scramble to figure out where a can of old paint thinner is supposed to go.
Check Your Lease Before You Start Cleaning
Your move out cleaning checklist should start with your actual lease, not a generic template. Many leases spell out specific cleaning obligations that go beyond “leave it clean,” and skipping this step means you might clean the wrong things or miss a requirement entirely.
Look for language about professional carpet cleaning, which some leases require regardless of carpet condition. Some leases also specify pest control treatments before move-out, particularly in properties that have had past issues. Others list appliance cleaning standards or even name specific products you’re expected to avoid, particularly harsh chemicals that can damage certain flooring or countertop materials.
If anything in your lease is vague or unclear, ask your landlord or property manager directly before you start cleaning, and get their answer in writing, even if it’s just a text message or email. A quick clarifying question now beats a disputed deduction later. Cleaning companies often recommend tenants request a written list of expectations before move-out specifically to avoid these gray areas.
Pull your lease and check for:
- Professional carpet cleaning requirements
- Specific cleaning products required or prohibited
- Pest control or fumigation clauses
- Any move-out cleaning fee already built into your lease
- Deadlines for returning keys or scheduling the final walkthrough
Some leases include a flat move-out cleaning fee regardless of how clean you leave the unit. If yours does, ask directly whether a professional clean is still worth pursuing or if that fee already covers it.
What Standard of Clean Do Landlords Actually Expect?
“Broom clean” and “move-in ready” are two very different standards, and knowing which one your landlord expects prevents wasted effort or unpleasant surprises. Most landlords expect a level of clean close to what you’d want to walk into yourself: no grease, no grime buildup, no lingering odors, and no visible damage beyond normal wear and tear.
Normal wear and tear covers things like minor carpet flattening from furniture, small scuffs on walls from daily life, and faded paint from sunlight. Damage covers things like burns, stains that won’t lift, broken fixtures, or holes larger than what a picture hanger would leave. This distinction matters because landlords cannot legally deduct for normal wear and tear in most states, only for actual damage or lack of cleanliness.
Most property managers are looking for the unit to be rentable to the next tenant without additional work on their end. That means every surface wiped, every appliance interior cleaned, floors vacuumed or mopped, and no personal items or trash left behind. Some landlords provide a written move-out standard as part of the lease or as a separate handout, which is worth requesting if you haven’t seen one.
Communicating clearly with your landlord about what you’ve done, and providing photo proof, tends to resolve most disagreements before they start. A landlord who sees a clean, documented unit has little incentive to manufacture a dispute.
DIY or Hire a Pro? Comparing the Real Costs
Cleaning it yourself costs less upfront, no question. A basic supply kit runs $30 to $60, and if you have a free weekend, that’s your only expense. But factor in your actual time, especially if you’re also packing, coordinating movers, and handling utility transfers during the same week. A DIY clean on a tight schedule often means rushed corners, which is exactly where deposit deductions come from.
Hiring a professional cleaning service costs more directly, but it buys you a receipt, a time-stamped proof of service, and typically a more thorough result on things like oven interiors and grout that most tenants rush through. If your lease requires professional carpet cleaning specifically, that receipt alone can be the difference between a full deposit return and a partial one.
A middle-ground approach works well for many renters: handle the straightforward rooms yourself (bedrooms, living areas, general dusting) and hire a professional specifically for the kitchen, bathroom, and carpets, where inspection standards are highest and mistakes are most visible. This splits the cost while covering the areas that carry the most deposit risk.
Whichever route you choose, keep every receipt. Even a $40 carpet spot-treatment receipt from a local service adds documented weight if your landlord tries to charge you for the same task.
Professional Cleaner Perspective: Three Insider Tips
Cleaners who handle move-outs daily notice the same patterns. Pull appliances whenever it’s safe to do so; the grime behind them is what most tenants forget entirely. Photograph before and after every room, not just at the end. And save every receipt, even for a $20 supply run, since itemized proof of effort matters in a dispute more than a landlord’s memory of what you told them.
Clear, written communication with your landlord about what’s been done heads off most disagreements before they start.
— Neat
Book a Move-Out Clean With Neat and Tidy Pros
Skipping the DIY grind entirely is the fastest way to check every box on this list without spending your last free weekend scrubbing grout. Neat and Tidy Pros’ move-in/move-out cleaning service covers the exact inspection points landlords check, including appliance interiors, bathroom grout and caulk, carpets, and every forgotten baseboard and vent, so you’re not guessing whether you missed a spot.

Book 2 to 3 weeks before your lease ends to lock in a slot before end-of-month demand fills the schedule, especially if you’re moving in a high-traffic period. Every completed job comes with a receipt you can hand directly to your landlord as proof of professional service, which carries real weight if a deposit dispute comes up later. If you’re weighing cost against your own time, see how the process and pricing work before deciding whether to book it yourself or bring in the team.
Sources
- Move-Out Cleaning Checklist: What Landlords Actually Check | TIDY Blog
- Move-Out Cleaning Checklist for Getting Your Deposit Back – PODS
- Care
- Move Out Cleaning Checklist Before Moving | Redfin