Post renovation cleaning is a specialized deep cleaning performed after construction or remodeling to remove construction dust, debris, paint splatters, adhesive residues, and grout haze that regular housekeeping cannot address. The industry standard term is post construction cleaning, and it covers everything from rough debris removal to final polishing of new surfaces. For California homeowners and contractors, this process is the difference between a construction site and a move-in ready home. It protects indoor air quality, preserves new finishes, and removes health hazards including silica dust and lead particulates that settle invisibly across every surface.
What is post renovation cleaning and how does it differ from regular cleaning?
Post renovation cleaning, also called post remodel cleaning or post construction cleaning, targets an entirely different category of contamination than standard housekeeping. Standard cleaning misses hard-to-remove construction residues like fine drywall dust, paint splatters, and adhesive films that bond to surfaces during a build. This matters because those residues are not just unsightly. They carry real health risks and can permanently damage new finishes if left untreated.
The tools required reflect that difference. A household vacuum spreads fine drywall dust back into the air rather than capturing it. Professional post construction cleaning relies on HEPA-filter vacuums, which trap particles down to 0.3 microns, along with microfiber cloths, specialized degreasers, and pH-neutral cleaners matched to specific surface types. Workers also wear PPE including N95 respirators, nitrile gloves, and safety glasses because hazardous dust like silica and lead requires hazard assessment and protective protocols before cleanup begins.
| Feature | Post renovation cleaning | Regular deep cleaning |
|---|---|---|
| Target contaminants | Drywall dust, paint, adhesives, grout haze | Everyday dirt, grease, grime |
| Equipment | HEPA vacuums, specialized chemical agents | Standard vacuums, all-purpose cleaners |
| PPE required | N95 respirators, gloves, eye protection | Typically none |
| Sequence | Phased: rough, main, final sparkle | Single-pass top-to-bottom |
| Timing | Scheduled after construction completion | Ongoing or periodic |
Pro Tip: Never use a standard shop vac for post renovation dust removal. Most shop vacs lack HEPA filtration and exhaust fine particulates back into the room, creating a second contamination event.
What are the main phases of the post renovation cleaning workflow?
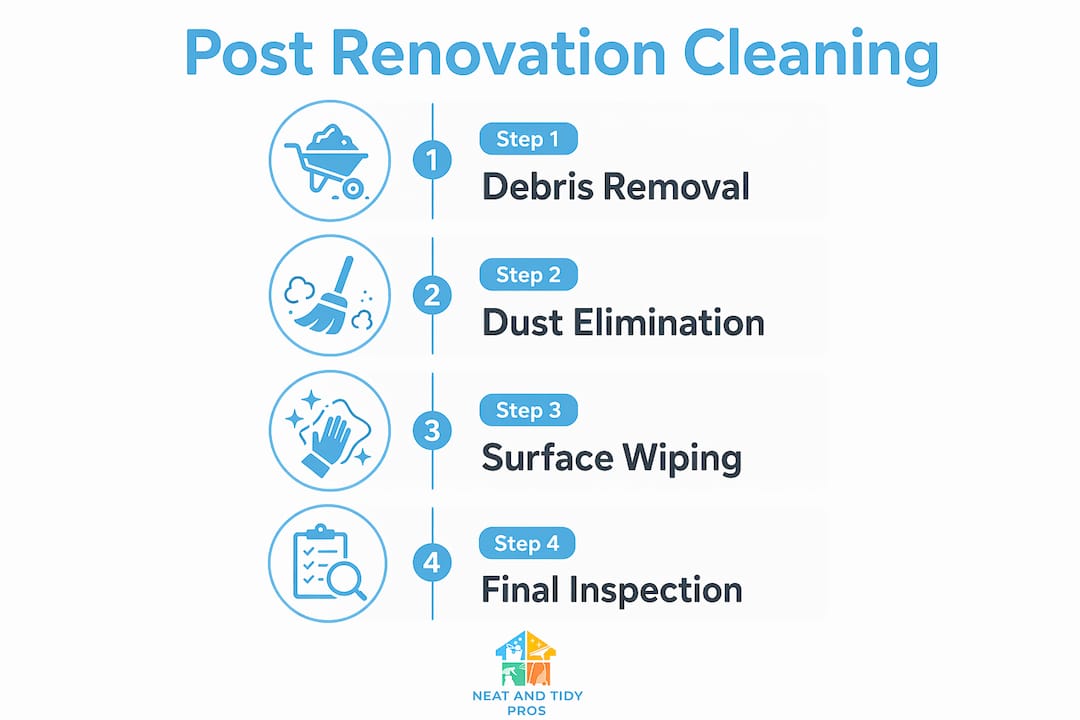
Post construction cleaning explained as a single event misses the reality. The process follows three distinct phases, each with a specific purpose and sequence. Skipping or combining phases leads to rework and leaves hazardous residues behind.
-
Rough clean. This phase removes bulk debris: broken tile pieces, lumber scraps, packaging materials, and large dust accumulations. Workers clear the space of all construction waste before any surface cleaning begins. This phase often happens while contractors are still finishing punch-list items.
-
Main clean. The main clean targets fine dust and residues on every surface. Crews work strictly top-to-bottom, starting with ceilings, light fixtures, and vents, then moving to walls, window frames, cabinets, and finally floors. Cleaning top-to-bottom prevents dust from resettling on already-cleaned surfaces below, which is the single most common cause of rework in post renovation projects. HEPA vacuuming precedes damp wiping on every surface.
-
Final sparkle clean. This phase covers polishing glass, buffing floors, wiping down fixtures, and conducting a detailed walkthrough inspection. It is the quality-control pass that confirms the space meets move-in standards.
Timing between phases matters as much as the phases themselves. Waiting 24 to 48 hours after contractors finish allows airborne dust to settle before the final cleaning pass. Starting too early means the final clean happens while dust is still suspended, and surfaces will need cleaning again. For California contractors coordinating with final inspections and occupancy walkthroughs, scheduling the sparkle clean after all punch-list work is complete prevents costly re-cleaning.
Pro Tip: Schedule the final sparkle clean only after the general contractor has signed off on all trades. Any remaining drilling, sanding, or caulking will re-contaminate surfaces and force a repeat of the main clean.
Which specific tasks are involved in post renovation cleaning?
The scope of post construction cleaning explained in a checklist format reveals how many surfaces accumulate hidden residues during a build. Kitchens and bathrooms require the most attention because multi-trade project areas accumulate combined residues including grout haze, adhesive films, paint splashes, and silicone caulk smears, often requiring different cleaning agents for each type.
Common examples of post renovation cleaning tasks include:
- Removing drywall dust from walls, ceilings, baseboards, and door frames using HEPA vacuuming followed by damp microfiber wiping
- Cleaning inside cabinets and drawers where fine dust settles during installation
- Clearing HVAC vents and return air grilles, which trap construction dust and distribute it throughout the home if left uncleaned
- Scrubbing grout haze from tile surfaces using a pH-neutral tile cleaner
- Removing paint splatters from glass, hardware, and flooring using appropriate solvents matched to the paint type
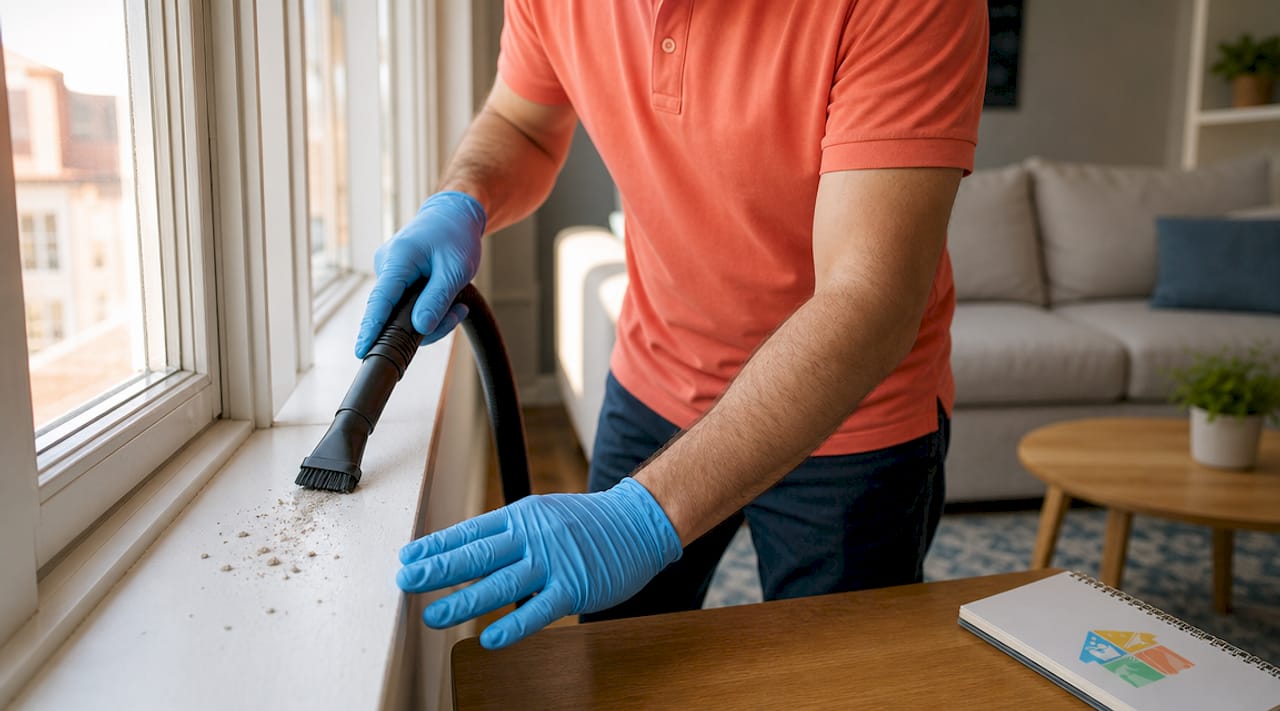
- Wiping window tracks, sill channels, and sliding door frames where debris compacts during construction
- Cleaning light fixtures and ceiling fans, which collect dust on internal components as well as external surfaces
- Buffing and polishing hardwood or tile floors after dust removal to restore the finish
The choice of cleaning agent matters. Grout haze requires an acidic cleaner, while new hardwood floors need a pH-neutral product to avoid stripping the finish. Adhesive residue on glass responds to isopropyl alcohol or a commercial adhesive remover. Using the wrong product on the wrong surface is one of the most common and costly mistakes in DIY post renovation cleaning.
| Residue type | Recommended cleaning method |
|---|---|
| Drywall dust | HEPA vacuum, then damp microfiber wipe |
| Paint splatters | Solvent matched to paint type (latex vs. oil) |
| Grout haze | Acidic tile cleaner, soft scrub pad |
| Adhesive residue | Isopropyl alcohol or commercial adhesive remover |
| Silicone caulk smears | Razor scraper on glass, silicone remover on tile |
Why do timing and safety matter in post renovation cleaning?
Post renovation cleaning is not just a cosmetic task. Removing dust and particulates prevents health hazards and damage to new materials, which makes timing and safety protocols non-negotiable rather than optional precautions.
Silica dust, generated by cutting concrete, brick, and tile, causes silicosis with repeated exposure. Lead dust, present in pre-1978 California homes undergoing renovation, triggers neurological damage at very low exposure levels. Both are invisible to the naked eye and remain suspended in air for hours after disturbance. Dry sweeping resuspends fine dust and undermines cleaning effectiveness entirely, which is why damp wiping and HEPA vacuuming are the only accepted methods for post construction dust removal.
For California homes built before 1978, the EPA Renovation, Repair, and Painting (RRP) Rule applies. Under this rule, clearance testing after cleaning confirms that lead dust levels meet regulatory standards before occupancy. Clearance testing is distinct from routine cleaning and is triggered by specific disturbance thresholds and building type criteria. Contractors working on pre-1978 housing in California must be RRP-certified, and homeowners should request documentation of clearance test results before moving back in.
Safety protocols for post renovation cleaning include:
- N95 or P100 respirators for anyone working in dust-heavy areas
- Nitrile gloves to prevent skin contact with chemical cleaning agents
- Safety glasses or goggles during overhead cleaning and chemical application
- Sealing HVAC systems during cleaning to prevent dust from entering ductwork
- Ventilating the space with fresh air after chemical cleaning agents are applied
For more on dust control protocols specific to California construction sites, the regulatory context adds another layer of responsibility for both homeowners and contractors.
How should homeowners and contractors approach post renovation cleaning?
DIY post renovation cleaning is possible for small projects like a single room repaint, but it becomes impractical quickly as project scope grows. The equipment investment alone, including a commercial-grade HEPA vacuum, microfiber systems, and appropriate chemical agents, often exceeds the cost of hiring a professional service for a single job.
Indicators that professional cleaning is the right call include:
- The renovation involved drywall work, tile installation, or concrete cutting
- The home was built before 1978 and lead dust protocols apply
- The project covered multiple rooms or the entire home
- The contractor timeline requires a fast turnaround for final inspection or occupancy
- Specialized surfaces like polished concrete, hardwood, or custom tile need specific treatment
When selecting a post renovation cleaning service in California, ask these questions directly:
- Do your crews use HEPA-filtered vacuums on every job?
- Are your staff trained in PPE use and hazardous dust protocols?
- Do you follow a phased cleaning workflow (rough, main, final)?
- Can you coordinate scheduling with the general contractor’s punch-list completion?
- Do you carry liability insurance for surface damage during cleaning?
Integrating cleaning into the renovation project timeline from the start prevents last-minute scrambles. The best practice is to include post renovation cleaning as a line item in the project schedule, with the final sparkle clean scheduled 48 hours after the last trade leaves the site. This approach aligns with new home cleaning guidance for California homeowners preparing to occupy a renovated space.
Pro Tip: Ask your cleaning service to provide a written scope of work before the job starts. A reputable provider will specify which surfaces, residues, and areas are covered, so there are no disputes about what was included.
Key takeaways
Post renovation cleaning is a phased, specialized process that protects health, preserves new finishes, and makes a renovated space safe for occupancy. It requires HEPA filtration, proper PPE, and a top-to-bottom sequence that standard cleaning cannot replicate.
| Point | Details |
|---|---|
| Definition is distinct | Post renovation cleaning targets construction residues, not everyday dirt, using specialized tools and methods. |
| Three-phase workflow | Rough clean, main clean, and final sparkle clean must be completed in sequence to avoid rework. |
| Timing is critical | Wait 24 to 48 hours after construction ends before the final clean to allow dust to fully settle. |
| Safety is non-negotiable | Silica and lead dust require PPE and, in pre-1978 California homes, EPA RRP clearance testing. |
| Professional tools matter | HEPA vacuums and surface-matched cleaning agents produce results that household equipment cannot achieve. |
What I’ve learned from years of post renovation cleaning in California
The most consistent mistake I see, whether from homeowners attempting DIY or contractors rushing to hand over a space, is cleaning the floors first. It seems logical. Floors are the most visible surface. But every ceiling fan, vent, and wall surface above still holds a layer of fine dust that will settle directly onto those freshly mopped floors within hours. The top-to-bottom sequence is not a preference. It is the only sequence that works.
The second thing I have learned is that vents are almost always skipped. Construction dust loads HVAC return grilles and supply vents heavily, and if those are not cleaned before the system runs, the first heating or cooling cycle distributes that dust throughout every room in the house. I have seen freshly cleaned spaces get re-contaminated within 24 hours because the HVAC was turned on before the vents were addressed.
For California homes specifically, the lead dust question comes up more than most homeowners expect. If your home was built before 1978 and you renovated anything involving walls, windows, or doors, you need to ask your contractor directly about RRP compliance and clearance testing. That is not a bureaucratic formality. It is a health protection for your family. The professional cleaning tools and protocols exist for a reason, and skipping them to save time or money creates problems that are far more expensive to fix later.
— Neat
Ready for a move-in ready home after your renovation?
Neatandtidypros brings professional-grade post construction cleaning to California homeowners and contractors who need results, not just effort. Every job uses HEPA-filtered vacuums, surface-matched cleaning agents, and a phased workflow built around your renovation timeline.
From single-room remodels to whole-home builds, Neatandtidypros handles the full scope: drywall dust, paint splatters, grout haze, adhesive residue, vent cleaning, and final sparkle walkthroughs. Scheduling is coordinated directly with your contractor timeline so the final clean happens at exactly the right moment. Explore the full range of post renovation services and book a cleaning that matches your project scope and move-in date.
FAQ
What is post renovation cleaning exactly?
Post renovation cleaning is a specialized deep clean performed after construction or remodeling to remove drywall dust, paint splatters, adhesive residue, and grout haze that regular cleaning cannot address. It follows a phased workflow and uses HEPA vacuums and surface-specific cleaning agents.
How is post construction dust removed safely?
HEPA-filtered vacuuming followed by damp microfiber wiping is the accepted method for post construction dust removal. Dry sweeping is avoided because it resuspends fine particulates and recontaminates already-cleaned surfaces.
When should I schedule post renovation cleaning?
Schedule the final cleaning pass 24 to 48 hours after all construction activity ends so airborne dust has time to settle. The final sparkle clean should happen only after the general contractor completes all punch-list work.
Do I need lead dust clearance testing after a renovation in California?
If your California home was built before 1978 and the renovation disturbed painted surfaces, the EPA RRP Rule applies. Clearance testing confirms lead dust levels meet regulatory standards before occupancy and is required under specific disturbance thresholds.
Can I do post renovation cleaning myself?
DIY post renovation cleaning works for small, low-dust projects like a single room repaint. For any work involving drywall, tile cutting, or pre-1978 homes, professional cleaning with HEPA equipment and proper PPE produces safer and more thorough results than household tools can achieve.