
For most bathroom floors, a paste of two parts baking soda to one part hydrogen peroxide, applied with a stiff nylon grout brush and left to sit for 10–30 minutes, is the fastest reliable home method to clean tile grout. Rinse thoroughly, extract the dirty slurry with a wet/dry vac or clean mop, and you’ll see a real difference in one session.
Two quick checks before you start:
- Stone tile? Skip vinegar and any acidic cleaner. Marble, travertine, and limestone etch permanently. Use pH-neutral or oxygen-based products only.
- Colored grout? Test a hidden 1-inch patch and wait 10 minutes before treating the whole floor. Some brightening agents can lift pigment from tinted grout.
If the test patch looks fine, you’re ready to go.
Key Takeaways
A baking-soda and hydrogen-peroxide paste (2:1) with a 10–30 minute dwell time, followed by thorough extraction and sealing, is the most reliable at-home method to clean and protect bathroom floor grout.
| Point | Details |
|---|---|
| Best starting method | Use a 2:1 baking soda to hydrogen peroxide paste; dwell 10–30 minutes before scrubbing. |
| Test before treating | Always test a hidden 1-inch patch and check stone compatibility before applying any cleaner to the full floor. |
| Extract, don’t just wipe | Use a wet/dry vac to pull up dirty slurry after scrubbing; mopping it around redeposits soil into grout pores. |
| Seal after every deep clean | Apply a penetrating grout sealer once grout is fully dry; reapply every 6–12 months in high-humidity bathrooms. |
| Know when to call a pro | Crumbling grout, recurring mold, or large unresponsive areas warrant professional extraction and regrouting. Neatandtidypros offers deep cleaning and grout restoration in Orange County and Corona, CA. |
Table of Contents
- Which DIY method works best for cleaning bathroom floor grout?
- Step-by-step: how to clean bathroom floor grout from prep to seal
- How to treat mold, mildew, limescale, and stubborn grout stains
- What tools and products actually work for bathroom floor grout
- Why grout gets so dirty so fast, and what pros do differently
- How to finish the job: sealing and recoloring grout
- When DIY won’t cut it: signs you need a professional
- An honest take on grout cleaning methods
- Neatandtidypros handles the grout jobs that wear you out
- Sources
Which DIY method works best for cleaning bathroom floor grout?
Not every stain responds to the same treatment. Grease and soap scum need a different approach than mold or mineral buildup. Here’s how the most common methods stack up.
| Method | Best for | Dwell time | Safe on natural stone? | Notes |
|---|---|---|---|---|
| Baking soda + hydrogen peroxide (2:1) | General grime, yellowing | 10–30 min | Yes (avoid on polished marble) | Most versatile starting point |
| Hydrogen peroxide + dish soap | Greasy grout, soap scum | 10–15 min | Yes | Good for kitchen-adjacent baths |
| Baking soda + water paste | Light surface dirt | 5–10 min | Yes | Mildest option; low risk |
| Vinegar-based cleaner | Mineral deposits, hard water | 10–15 min | No | Etches marble, travertine, limestone; degrades sealer |
| Oxygen bleach (sodium percarbonate) | Deep organic stains, mold | 30–60 min | Check label | Safer for grout structure than chlorine bleach |
| Commercial grout cleaner (pH-neutral) | General maintenance | Per label | Yes (pH-neutral only) | Read label; avoid acid-based formulas on stone |
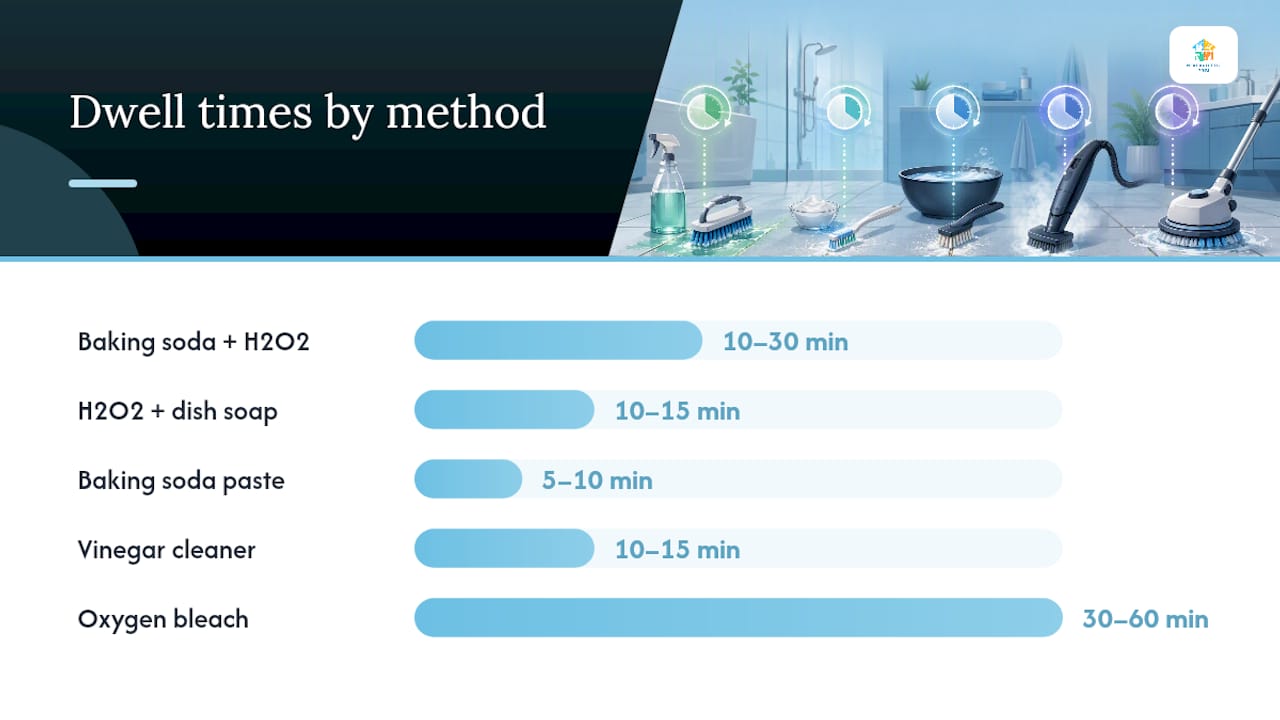
pH-neutral cleaners are the safe universal default; acidic cleaners like vinegar can etch marble, travertine, and limestone and degrade grout sealer. That warning applies even to “natural” cleaning solutions that get recommended widely online.
Oxygen bleach (sodium percarbonate) is worth knowing about because it breaks down organic stains rather than just whitening the surface. Chlorine bleach can whiten grout temporarily, but repeated exposure degrades Portland cement grout, making it brittle over time. Use chlorine bleach sparingly and only for surface mold, never as a routine cleaner.
Step-by-step: how to clean bathroom floor grout from prep to seal
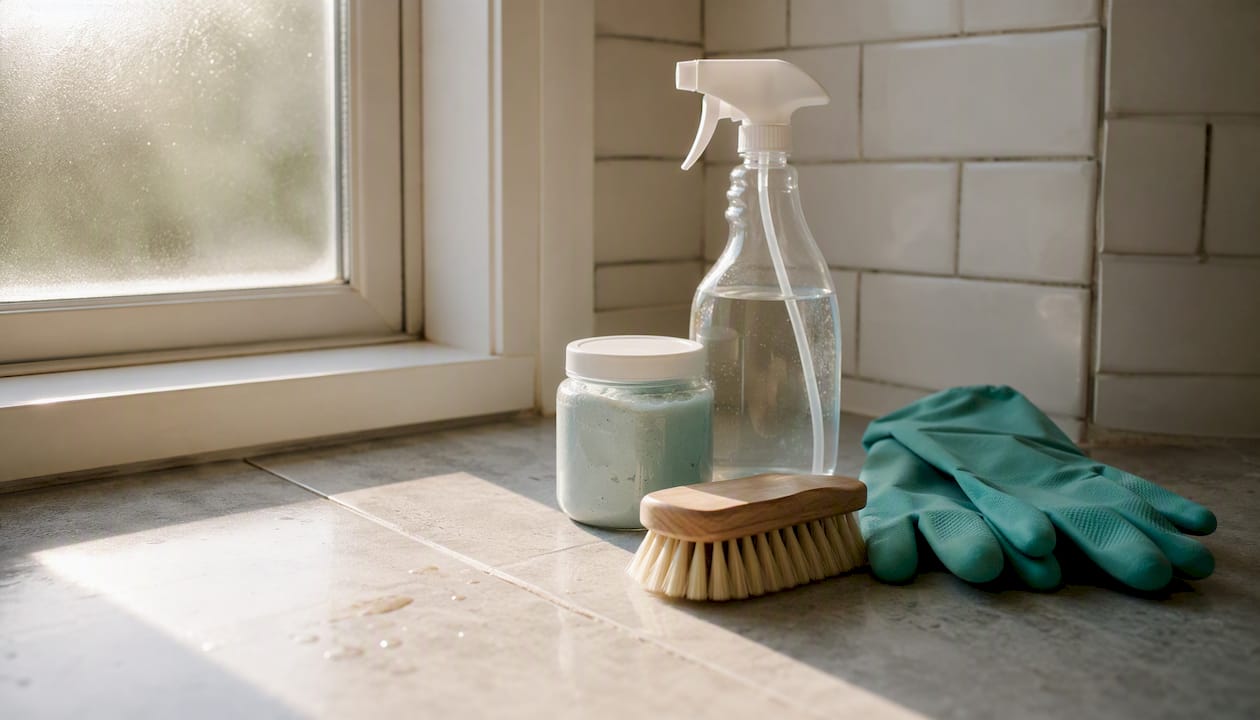
Work through this sequence once and you’ll have a repeatable system for every future cleaning.
What you’ll need
- Stiff nylon grout brush or OXO-style grout brush
- Old toothbrush for corners and tight spots
- Bucket, spray bottle, and clean water
- Wet/dry shop vac or microfiber mop
- Rubber gloves and safety goggles
- Your chosen cleaner (baking soda paste, oxygen bleach, or pH-neutral spray)
- Penetrating grout sealer (for the finish step)
The cleaning sequence
- Sweep or vacuum the floor. Remove all loose grit before applying any liquid. Wet grit turns into an abrasive slurry that scratches tile.
- Run the water-bead test. Drip a few drops of water onto a grout line. If the water beads up, sealer is still active. If it soaks in within 30 seconds, the grout is unsealed and more porous — plan to reseal after cleaning.
- Test a hidden patch. Apply your chosen cleaner to a 1-inch section near the toilet base or behind the door. Wait 10 minutes, rinse, and check for color change or surface damage before proceeding.
- Apply cleaner to a 4–6 sq ft section. Work in small sections rather than treating the whole floor at once. Professionals advise working in 4–6 sq ft sections, allowing proper dwell time, and extracting dirty slurry rather than simply wiping.
- Let it dwell. For the baking soda and hydrogen peroxide paste, 10–30 minutes is the target range. Oxygen-bleach treatments need 30–60 minutes for deep stains.
- Scrub with circular motion. Press the grout brush firmly into the grout line and work in short circular strokes. Straight back-and-forth motion is less effective at lifting embedded soil. Switch to a toothbrush for grout around fixtures and in corners.
- Extract the dirty slurry. This is the step most people skip. Use a wet/dry vac to pull up the dissolved grime before it dries back into the grout pores. If you don’t have a vac, use a clean mop and rinse it frequently. Extracting dirty slurry rather than simply wiping prevents redepositing soil back into the grout.
- Rinse with clean water. Mop the section with plain water twice. Alkaline cleaner residue left on grout attracts new dirt almost immediately.
- Move to the next section. Repeat steps 4–8 across the floor, working toward the door so you don’t walk on cleaned areas.
- Dry the floor fully. Open windows, run the exhaust fan, or use a fan. Grout must be completely dry before sealing — typically 24 hours in a well-ventilated bathroom.
Pro Tip: Wear goggles when using a drill-mounted brush or any spray cleaner. Cleaner flicks upward during scrubbing, and eye contact with hydrogen peroxide or oxygen bleach is painful.
How to treat mold, mildew, limescale, and stubborn grout stains
Surface mold (the fuzzy gray or pink growth you can wipe off with a cloth) and deep-set mold (black staining that has penetrated the grout body) need different responses.
For surface mold and mildew:
- Apply a diluted chlorine bleach solution (1 part bleach to 10 parts water) directly to the affected grout lines.
- Let it sit for 5–10 minutes, scrub with a nylon brush, and rinse thoroughly.
- Use chlorine bleach sparingly. Repeated exposure weakens cement grout and makes it crumble.
For deep-set mold and organic staining:
- Mix an oxygen-bleach powder (sodium percarbonate) with warm water to form a thick paste.
- Pack the paste onto the stained grout and cover with plastic wrap to slow evaporation.
- Allow 30–60 minutes of dwell time, then scrub and extract. Oxygen bleach breaks down organic matter rather than only whitening the surface, which is why it outperforms chlorine bleach for deep stains.
- Rinse twice with clean water and extract.
For limescale and hard-water deposits:
- A pH-neutral descaler or a paste of baking soda and water works on ceramic and porcelain tile.
- On natural stone, avoid any acid-based descaler. Use a stone-safe, pH-neutral product and check the label before applying.
When to stop and call a professional:
- Mold returns within a week or two after multiple oxygen-bleach treatments. That usually signals moisture intrusion behind the tile, not just surface contamination.
- Grout crumbles or flakes when you scrub. Cleaning won’t fix structurally compromised grout — it needs regrouting.
- Staining covers a large area and hasn’t responded to two full treatment cycles.
What tools and products actually work for bathroom floor grout
The right brush makes a bigger difference than the cleaner. Here’s what to buy and what to skip.
Recommended tools:
- Stiff nylon grout brush: The standard starting point. OXO makes a well-regarded version with an angled head that fits standard grout lines. Stiff nylon grout brushes give effective mechanical action without the tile-damaging risks of wire brushes.
- Old toothbrush: Indispensable for corners, around toilet bases, and grout near fixtures.
- Drill-mounted nylon cup brush: Speeds up large floor areas significantly. Run it at low speed (under 300 RPM) to avoid flicking cleaner and to reduce tile damage risk. Avoid on mosaic or natural stone tiles.
- Electric spin scrubber: A cordless spin scrubber with a small round head attachment works well on floor grout and saves a lot of wrist strain on larger bathrooms.
- Wet/dry shop vac: The single most underrated tool for grout cleaning. Extracting the dirty slurry rather than mopping it around is what separates a good result from a great one. See the professional cleaning tools guide for a breakdown of when powered equipment pays off.
- Microfiber mop: For rinsing and final cleanup when a wet vac isn’t available.
Recommended product types (US market):
- Oxygen bleach powder (e.g., OxiClean or generic sodium percarbonate): $8–$15 for a large container. Effective for deep stains and safe for repeated use on cement grout.
- Hydrogen peroxide (3%): Standard drugstore bottle, $1–$3. Mix 1 part with 2 parts baking soda for the paste method.
- pH-neutral tile and grout cleaner: Look for “pH-neutral” or “stone-safe” on the label. Brands like Black Diamond and Aqua Mix make widely available options.
- Penetrating grout sealer: Miracle Sealants 511 and Aqua Mix Sealer’s Choice Gold are commonly available at Home Depot and Lowe’s, typically $15–$30.
What to avoid:
- Wire brushes or metal scrapers (scratch tile surfaces permanently)
- Undiluted chlorine bleach as a routine cleaner
- Vinegar or lemon juice on natural stone or sealed grout
- Abrasive powder cleansers directly on grout (they scratch and leave residue)
PPE: Rubber gloves and safety goggles are non-negotiable when working with bleach or hydrogen peroxide. Ventilate the bathroom by opening a window or running the exhaust fan throughout the job.
Why grout gets so dirty so fast, and what pros do differently
The Tile Council of North America points out something most homeowners don’t realize: much of the visible grime on grout is sticky soap film, not dirt alone. Soap residue bonds to the porous grout surface and then acts like a magnet for everything else — skin cells, mineral deposits, and airborne particles. That’s why a floor can look grimy again within days of cleaning if the residue isn’t fully removed.
The single most important step most DIYers skip is extraction. Scrubbing loosens the soil, but if you mop it around instead of pulling it out, you’re redepositing dissolved grime back into the grout pores. A wet/dry vac after scrubbing changes the result entirely.
pH and material compatibility are the other area where most cleaning mistakes happen. Acidic cleaners feel aggressive and effective, but on natural stone they cause permanent etching that no amount of cleaning will fix. Tile pros default to pH-neutral or oxygen-based cleaners and reserve stronger chemistry for specific stain types, not routine use.
Sealing is the maintenance step that actually reduces how often you need to deep clean. Professional guidance recommends applying a penetrating grout sealer after cleaning and reapplying every 6–12 months in high-humidity locations like bathrooms. Routine habits help too: running the exhaust fan for 15–20 minutes after showers, wiping up spills promptly, and doing a light weekly scrub with a pH-neutral spray all reduce how much work accumulates between deep cleans.
Pro Tip: After cleaning, run the exhaust fan for at least 20 minutes and leave the bathroom door open. Grout that stays damp re-grows mildew faster than grout that dries quickly.
How to finish the job: sealing and recoloring grout
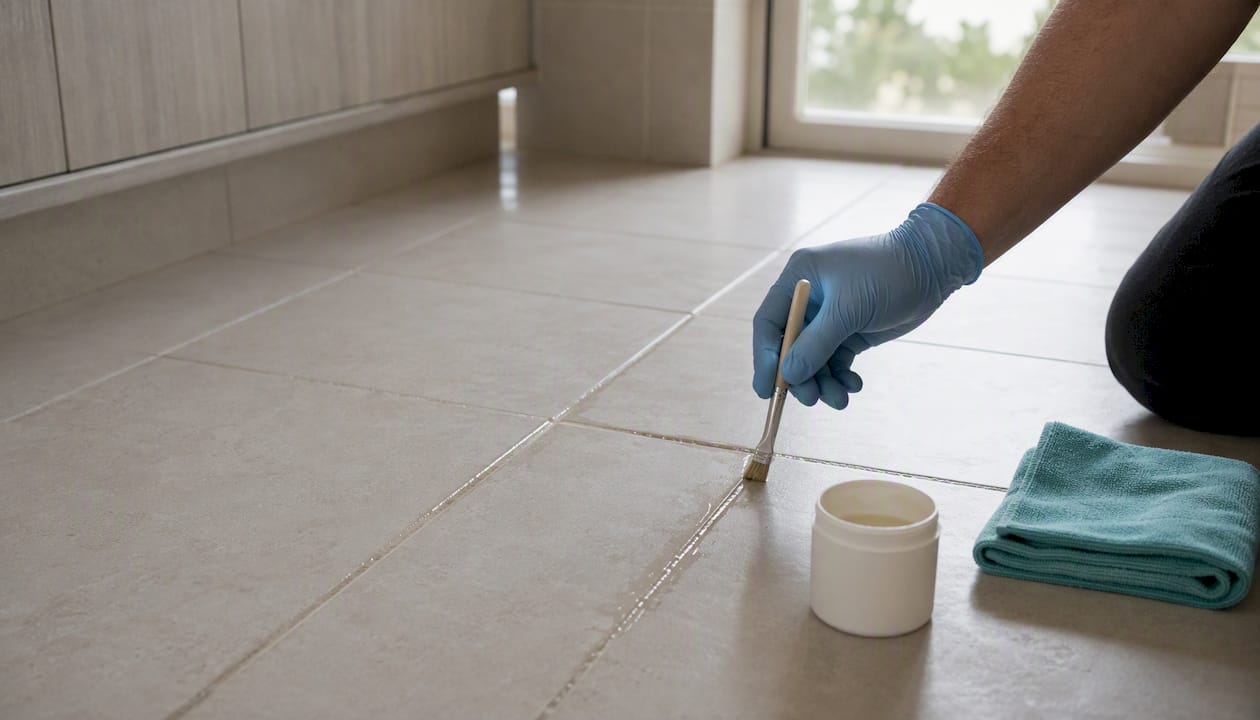
Cleaning restores the grout surface. Sealing protects it. Skipping the seal after a deep clean means the porous grout starts trapping dirt again almost immediately.
Water-bead test (do this before sealing):
- Drop a few water droplets onto clean, dry grout.
- If water beads for 30+ seconds, existing sealer is still working. You may not need to reseal yet.
- If water absorbs within 30 seconds, the grout is ready to seal.
Applying grout sealer:
- The grout must be completely dry before sealing — at least 24 hours after cleaning in a well-ventilated bathroom.
- Apply a penetrating (impregnating) grout sealer with a small applicator brush or the bottle’s built-in tip, working along each grout line.
- Wipe excess sealer off tile surfaces within 5–10 minutes to avoid a hazy film.
- Allow the sealer to cure per the manufacturer’s instructions (typically 24–48 hours) before heavy foot traffic or wet use.
- Reapply every 6–12 months in a bathroom with daily shower use.
If cleaning didn’t restore the color:
- A grout pen or grout colorant can refresh discolored grout lines without regrouting. Brands like Rust-Oleum and Mapei make colorants available at most hardware stores.
- Clean and dry the grout thoroughly before applying. Apply the colorant along each line, let it dry for 24+ hours, then seal over it.
- If the grout is crumbling, flaking, or missing in sections, colorant won’t help. That’s a regrouting job.
If existing sealer needs stripping before recoloring:
- Apply a commercial sealer stripper (available at tile specialty stores) per label directions.
- Scrub, extract, and rinse before applying colorant or fresh sealer.
When DIY won’t cut it: signs you need a professional
Some grout problems are beyond what a brush and a paste can fix, and pushing harder with aggressive DIY methods often makes things worse.
Call a professional when:
- Grout is crumbling, cracking, or missing in sections. No cleaner fixes structural failure — the grout needs to be removed and replaced.
- Mold keeps returning within a week or two despite repeated oxygen-bleach treatments. Persistent mold usually means moisture is coming from behind the tile, not just from surface humidity.
- The floor is large (think a full master bath or a tiled mudroom) and multiple treatment cycles haven’t moved the stain. Time and physical effort make DIY impractical at that scale.
- Grout is so deeply discolored that even oxygen-bleach soaks haven’t changed it after two full treatments.
What professionals do that you can’t easily replicate at home:
- Steam extraction at temperatures that kill mold spores and loosen embedded soil without chemical saturation
- Industrial-grade oxygen-bleach treatments with controlled dwell and immediate hot-water extraction
- Grout restoration and recoloring across large areas with consistent, professional-grade colorants
- Controlled regrouting that matches existing tile spacing and color
Risks of aggressive DIY escalation:
- Angle grinders used to remove grout frequently nick tile edges, leaving permanent chips.
- Wire brushes scratch glazed tile surfaces.
- Rinsing mistakes that leave alkaline residue trapped under a freshly applied sealer create a hazy, sticky surface that’s harder to fix than the original stain.
Understanding how deep cleaning differs from regular cleaning helps set realistic expectations for what a professional visit actually delivers versus a thorough DIY session.
An honest take on grout cleaning methods
The gentlest method that works is always the right starting point. That’s not a cautious hedge — it’s practical. Baking soda and hydrogen peroxide handle the majority of bathroom floor grout stains without any risk to tile, sealer, or grout structure. Escalating to oxygen bleach or a commercial cleaner makes sense when the paste method doesn’t move the stain after a full dwell cycle. Reaching for chlorine bleach or an acid-based cleaner as a first move is how people end up with etched stone or crumbling grout.
The other thing worth saying plainly: most people underestimate how much the rinse and extraction step matters. Scrubbing is satisfying and visible. Extracting the slurry feels like an optional extra. But the TCNA’s guidance on grout cleaning is clear that improperly rinsed alkaline cleaners leave sticky films that immediately attract new dirt. A floor that looks clean the day you scrub it and looks grimy again within a week almost always has a residue problem, not a stain problem.
Test before you treat. Protect fixtures and adjacent surfaces. Work in small sections. And if the grout is structurally compromised, no cleaning method is a substitute for regrouting.
Neatandtidypros handles the grout jobs that wear you out
Some bathroom floors need more than a paste and a brush. If you’re dealing with deep-set mold, large tiled areas, grout that hasn’t responded to multiple DIY treatments, or you simply want the job done right without spending a weekend on your knees, Neatandtidypros offers professional deep cleaning services that include grout treatment, extraction, and sealer application.

Neatandtidypros serves homeowners and renters in Orange County and Corona, California, with deep cleaning, move-in/move-out cleaning, and post-construction cleaning. A pro visit means inspection, a targeted treatment plan, and extraction equipment that pulls dissolved grime out of grout pores instead of pushing it around. No guesswork about dwell times or whether you’ve rinsed thoroughly enough. See the full services overview and book a visit that fits your schedule.
Sources
- Tile Council of North America (TCNA) — Cleaning grout FAQ
- Tom’s Guide — How to clean grout like a pro: Expert tips for tackling tough stains (and what to avoid)
- The Spruce — How to clean and restore tile grout
- Real Simple — How to clean grout naturally
- Martha Stewart — Best way to clean and brighten grout and tiles
- CleaningTuts — How to clean bathroom tile