
Declutter first, then deep-clean the highest-impact rooms, kitchen, bathrooms, and entryway, before moving through the rest of the house on a several-day schedule. That order matters more than the products you use. Below you’ll find a printable-style, room-by-room breakdown, the toolkit to gather before you start, and a day-by-day plan you can shrink into a single weekend if that’s all the time you have. Backing this up: guidance from the American Cleaning Institute on pacing the work, and, if you’d rather skip the scrubbing altogether, Neat and Tidy Pros can take the whole thing off your plate.
TL;DR:
- Tackling high-visibility areas like the kitchen, bathrooms, and entryway first yields the most noticeable improvements in a limited time.
- Preparing a comprehensive toolkit with microfiber cloths, all-purpose cleaner, vacuum attachments, and basic supplies ensures efficiency and avoids delays.
- Decluttering into keep, donate, trash, and store piles before cleaning reduces dust buildup and speeds up the process significantly.
- Deep cleaning appliances, grout, and high-touch surfaces is best scheduled over several days or delegated to professionals for thoroughness.
- Spreading spring cleaning tasks across six days rather than one reduces burnout and results in a more comprehensive, less rushed deep-clean.
Table of Contents
- Quick-Start: High-Impact Tasks You Can Do Today
- Supplies and Toolkit to Gather Before You Start
- Prep and Declutter: The Four-Pile Workflow
- Kitchen Deep-Clean Checklist: Appliances, Cabinets, and Surfaces
- Bathroom Deep-Clean Checklist
- Living Rooms and Bedrooms: Soft Surfaces and Top-to-Bottom Dusting
- Laundry Room, Utility, and Maintenance Tasks
- Entry, Garage, and Outdoor Areas
- Often-Overlooked Spots and How to Clean Them Efficiently
- A 6 to 7 Day Schedule You Can Actually Follow
- Safety, Sanitizing, and Seasonal Maintenance Checks
- When to Hire a Pro and What Professional Deep-Cleaning Includes
- Tips for Organizing Cleaned Spaces to Maintain Order
- Author Perspective: Practical Tips and Common Mistakes
- How Neat and Tidy Pros Handles Your Spring Deep Clean
- Sources
Quick-Start: High-Impact Tasks You Can Do Today
You don’t need a free weekend to see a difference. A handful of targeted tasks, done in the first hour or two, change how the whole house feels. Forbes points to the kitchen, entryway, and bathrooms as the rooms worth tackling first, since they’re the spaces people notice and find dirty most.
Here’s where to spend your first two hours for the biggest visible payoff:
- Scrub the toilet, inside and out (20 to 30 minutes) — includes the base, hinges, and behind the tank.
- Clear and wipe down the fridge (30 to 45 minutes) — toss expired items, wash shelves, wipe the door seals.
- Wipe every kitchen counter and backsplash (15 minutes) — grease builds up faster than most people realize.
- Clean the entryway floor and mat (10 minutes) — this is the first thing guests see and the last thing homeowners notice.
- Wash the front-facing windows (20 minutes) — nothing signals “clean house” faster than clear glass.
- Vacuum living room and bedroom carpets (20 minutes per room) — a quick pass now, a deeper one later.
- Wipe down bathroom sinks and mirrors (10 minutes each) — fast, visible, satisfying.
- Clear kitchen and bathroom counters of clutter (15 minutes) — visual clutter reads as dirt even when it isn’t.
- Empty every trash can in the house (10 minutes) — obvious, but it’s the task people skip.
- Sweep or vacuum the garage entry point (15 minutes) — tracked-in dirt starts here.
Start with rooms that show progress fast, glass, open counters, floors, because seeing results early keeps you moving. Save the tasks that need special tools or extra dry time (oven self-clean cycles, carpet shampooing, grout scrubbing) for when you’ve got a longer block of time set aside. Those jobs eat hours, not minutes, and rushing them usually means redoing them.
Supplies and Toolkit to Gather Before You Start
Running out mid-task to buy a scrub brush kills momentum faster than almost anything else. The American Cleaning Institute recommends assembling your full kit before you touch a single surface, and that short prep step saves real time later.
Your baseline toolkit should include:
- Microfiber cloths (buy more than you think you need, at least a dozen)
- All-purpose cleaner and a dedicated glass cleaner
- A vacuum with a crevice tool and upholstery attachment
- A mop, plus a bucket if yours doesn’t have a built-in reservoir
- Sponges, non-scratch scrub pads, and rubber gloves
- Heavy-duty trash bags and clear storage bins for sorting
For the stubborn jobs, stock up on baking soda and white vinegar for grease and mineral buildup, a stiff grout brush, and a descaling solution for showerheads and faucets. These four items handle 90 percent of the “why won’t this come off” moments you’ll run into.
Statistic Callout: Households that spread spring cleaning across roughly six days, rather than cramming it into one exhausting weekend, tend to finish more thoroughly and with less burnout, according to the American Cleaning Institute.
One safety note worth taking seriously: never mix bleach with ammonia or vinegar. The combination produces toxic fumes. Crack a window or run a fan any time you’re using strong chemical cleaners, and wear gloves for anything with bleach or heavy-duty degreaser. Cleaning removes dirt and grease. Sanitizing reduces germs to a safe level. Disinfecting kills a specific percentage of germs and viruses, and it’s usually only necessary on high-touch surfaces or after someone in the house has been sick, not on every countertop, every week.
Prep and Declutter: The Four-Pile Workflow
Clutter is the enemy of efficient cleaning. Every item sitting on a counter or floor has to be moved, cleaned around, and moved back, which doubles your work in every room. Martha Stewart’s checklist recommends sorting everything into four piles before you pick up a rag: keep, donate, trash, and storage.
Work through each room with this sequence:
- Set a timer for 20 to 30 minutes per room and commit to sorting only, no cleaning yet.
- Pull everything off a single surface or out of a single drawer, and sort it into one of the four piles.
- Bag or box the donate and trash piles immediately, and carry them out of the room before you continue.
- Move surviving “keep” items into labeled storage bins if they’re not staying in that room.
- Repeat surface by surface until the room is fully sorted.
Pro Tip: Stage your donation boxes by the front door or garage as you fill them. A box that sits in a bedroom “for later” almost never makes it to a donation center.
Decluttering first also cuts down on how much dust resettles once you’ve wiped a surface, since fewer objects means fewer edges collecting it.
Kitchen Deep-Clean Checklist: Appliances, Cabinets, and Surfaces
The kitchen earns its reputation as the most exhausting room to deep-clean, and also the most satisfying once it’s done. Start with the fridge: empty it completely, wash every shelf and drawer with warm soapy water, and check the door gaskets for grime buildup that keeps the seal from closing tight. If you can access the condenser coils on the back or bottom, a quick vacuum there improves the fridge’s efficiency.
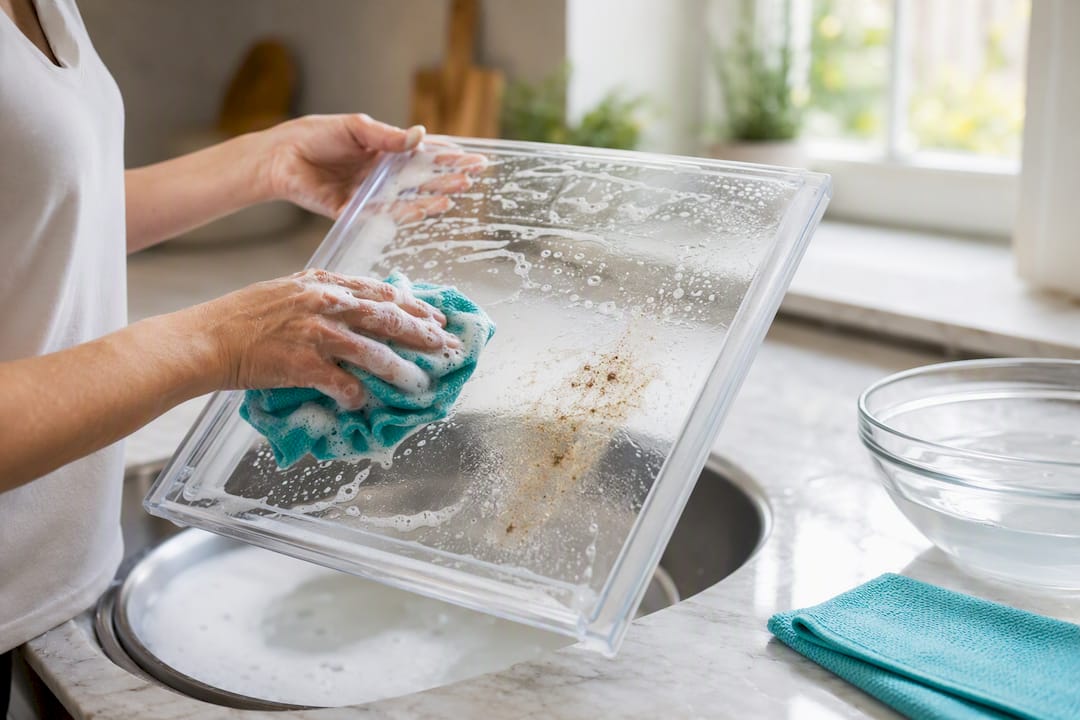
The oven and range need the most patience. Run a self-clean cycle if your model has one, or make a baking-soda paste for the interior and let it sit overnight before wiping it out. While you’re at it, pull the range hood filter and either wash it or replace it, and degrease the backsplash behind the stove, that’s where months of cooking splatter accumulate unnoticed.
Cabinets go section by section: empty one, wipe the interior, replace any liner paper that’s peeling or stained, then move to the next. Doing the whole kitchen’s cabinets at once means standing in a pile of dishes for hours.
Finish with the parts people touch every day:
- Sanitize the sink and all food-prep surfaces with a food-safe cleaner.
- Wipe down cabinet handles and light switches, both are high-touch and rarely cleaned.
- Descale the faucet if you notice mineral buildup.
- Mop the floor last, once everything above it is done.
For appliance-specific steps, a detailed guide to deep cleaning kitchen appliances and a full oven deep-cleaning walkthrough cover the process room by room in more depth than a checklist can.
Bathroom Deep-Clean Checklist
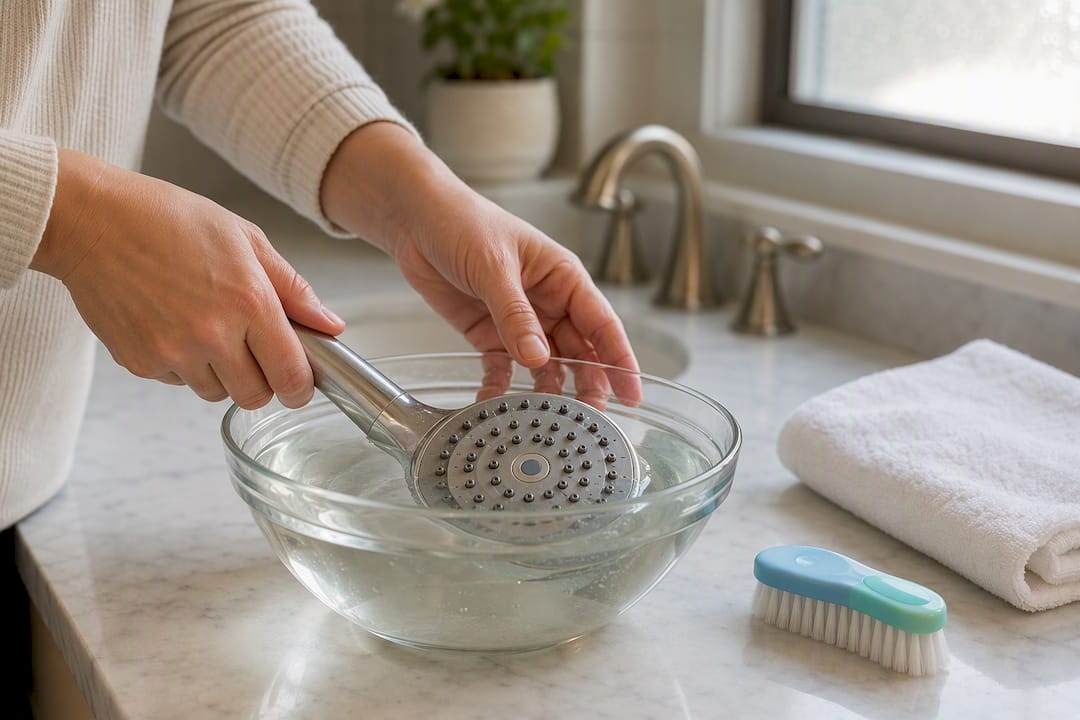
Bathrooms accumulate mineral deposits, soap scum, and mold faster than any other room, largely because of constant moisture. Start with the showerhead: soak it in a vinegar solution to dissolve mineral buildup, then move to the glass shower door tracks, which trap soap scum and hair in a way that’s easy to ignore until it’s thick.
Grout deserves real attention here. Scrub grout lines with a stiff brush and a baking-soda paste, and while you’re down there, inspect the caulk around the tub and shower for gaps, cracking, or dark spots. Failing caulk lets water seep behind tile and into walls, so re-caulking now is far cheaper than dealing with hidden water damage later, a point Martha Stewart’s checklist flags as preventive maintenance worth doing every spring.
Work through the rest of the room:
- Scrub the toilet base and the floor behind it, an area almost everyone skips.
- Launder bathmats and shower curtain liners on a hot cycle if the fabric allows it.
- Remove the exhaust fan cover and vacuum out the dust buildup, which restricts airflow and invites mold if left alone.
- Wipe down all mirrors, fixtures, and cabinet hardware.
Reach for a disinfectant only where germs genuinely accumulate, the toilet, the sink handle, and the door handle, and always let the product sit for the full contact time listed on the label before wiping or rinsing.
Living Rooms and Bedrooms: Soft Surfaces and Top-to-Bottom Dusting
Dust settles downward, so clean these rooms from the ceiling down, or you’ll redo your floors twice. Start with ceiling fan blades and light fixtures, then move to crown molding, shelves, and finally baseboards.
Mattresses need more attention than most people give them. Vacuum both sides, sprinkle baking soda across the surface, let it sit for 15 minutes to absorb odor and moisture, then vacuum it off. Rotate the mattress if your model recommends it, and wash all bedding, including the mattress protector, on the warmest cycle its care label allows.
Curtains and drapes trap dust and pet hair for months without showing it. Check the care label. Many can go straight into the washer on a gentle cycle; others need a trip to the dry cleaner.
For upholstery:
- Vacuum couches and chairs with the upholstery attachment, including under cushions.
- Spot-clean visible stains with a fabric-safe cleaner, testing on a hidden patch first.
- Consider professional upholstery cleaning for deep-set odors or stains that don’t respond to spot treatment.
Finish each room with a full baseboard wipe and a final vacuum pass once the dust from higher surfaces has settled.
Laundry Room, Utility, and Maintenance Tasks
The laundry room rarely gets deep-cleaned, which is exactly why it needs it. Wipe down the washer’s rubber door gasket, where mold and mildew build up unnoticed, then run an empty cycle with a washer-cleaning tablet or a cup of white vinegar to clear out detergent residue.
Clean the dryer’s lint trap after every load, but during a deep clean, go further:
- Pull the lint trap out completely and wash it with soap and water.
- Check the exterior dryer vent opening for lint buildup or blockage.
- Note that vents requiring roof or attic access are safer left to a professional vent-cleaning service, since blocked vents are a documented fire hazard.
Check under every sink in the house for slow leaks or water stains while you’re in cleaning mode. Sanitize trash and recycling bins with warm soapy water, and take five minutes to reorganize your cleaning supplies so next season’s cleanup starts faster.
Entry, Garage, and Outdoor Areas
The entryway sets the tone for the whole house, and it takes the most daily abuse. Sweep and sanitize the floor, wash or shake out the doormat, and sort through the shoe and coat pile, anything unworn all winter is a strong donation candidate.
The garage is where clutter goes to hide. Sweep the floor, declutter shelving, and check storage bins for signs of pests or water damage while everything’s out where you can see it.
Outdoor spaces round out the list:
- Hose down exterior window screens and let them dry before reinstalling.
- Wipe or hose off patio furniture and cushions.
- Sweep porches and patios, and check for winter debris in gutters near the entry.
Often-Overlooked Spots and How to Clean Them Efficiently
These are the details that separate a good clean from a professional-looking one. Baseboards, ceiling fan blades, vents, switch plates, and window tracks rarely get touched during a regular cleaning routine, and they’re the first places dust visibly reappears.
A few techniques speed this up considerably:
- Slide a damp pillowcase over each ceiling fan blade and pull it off, this traps the dust instead of scattering it across the room.
- Pop out vent and register covers and soak them in warm soapy water while you clean elsewhere.
- Use your vacuum’s crevice tool along window tracks and behind radiators.
- Pull light appliances like toasters and coffee makers away from the wall to wipe up crumbs and grease you can’t see from the front.
Pro Tip: Move heavy furniture with a partner, or slide furniture sliders under the legs before pushing. A cleaned floor with a strained back isn’t a win.
Always cut power at the breaker or switch before removing a light fixture cover, and skip electrical cleaning altogether if you’re not confident doing it safely.
A 6 to 7 Day Schedule You Can Actually Follow
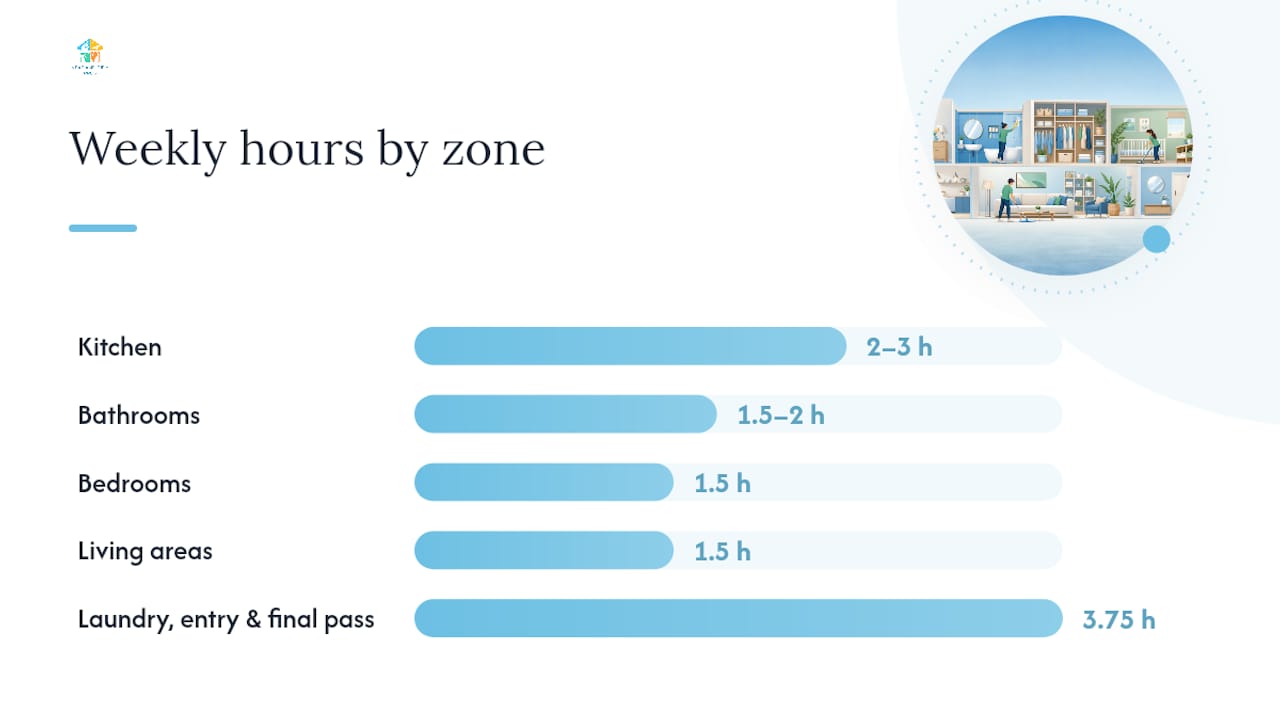
Trying to deep-clean an entire house in one day is how most spring-cleaning attempts fail halfway through. The American Cleaning Institute notes that the average household spreads this work across roughly six days, and that pacing holds up better than a single marathon session.
A sample 7-day zone plan:
- Day 1, Kitchen (2 to 3 hours): appliances, cabinets, counters, floor.
- Day 2, Bathrooms (1.5 to 2 hours): grout, caulk, exhaust fans, fixtures.
- Day 3, Bedrooms (1.5 hours): mattresses, bedding, dusting, closets.
- Day 4, Living areas (1.5 hours): upholstery, windows, baseboards.
- Day 5, Laundry and utility (1 hour): washer, dryer, under-sink checks.
- Day 6, Entry, garage, outdoor (1.5 to 2 hours): sweeping, organizing, patio.
- Day 7, Overlooked spots and final pass (1 hour): vents, fans, switch plates.
If a full week isn’t realistic, compress it into a weekend by hitting only the kitchen, bathrooms, and entryway in full, then handling bedrooms and living areas with a lighter, surface-level pass. Push laundry-room maintenance and overlooked spots to the following weekend.
Break each session into 25 to 90 minute blocks rather than open-ended stretches. A defined end time keeps you from burning out halfway through a room, and finishing a timed block, even a short one, builds the momentum to start the next.
Safety, Sanitizing, and Seasonal Maintenance Checks
Cleaning removes visible dirt and grime. Sanitizing lowers germ counts to a safer level. Disinfecting is the strongest step, meant for surfaces where illness has been present or that get touched constantly, like doorknobs and toilet handles, not the whole house on a weekly basis.
Keep these safety basics in mind:
- Wear a mask when disturbing dusty vents, old insulation, or moldy caulk.
- Open windows or run a fan whenever you’re using a strong chemical product.
- Never combine bleach with ammonia-based cleaners or vinegar.
Spring is also the right moment for seasonal maintenance that has nothing to do with dirt. Good Housekeeping’s roundup of expert advice recommends replacing HVAC filters, testing smoke detector batteries, and checking damp areas like basements and under bathroom sinks for early mold growth while you’re already in cleaning mode.
When to Hire a Pro and What Professional Deep-Cleaning Includes
Some jobs are worth handing off, especially in a larger home, after a renovation, or when allergens have built up over a long winter. Professionals often bring commercial-grade equipment for tasks like carpet extraction and vent cleaning that a standard household kit can’t match, and hiring out a deep clean can save roughly 8 to 16 hours of your own time on a typical home.
Consider calling in help when:
- You’re moving in or out and need the space cleaned to a specific standard on a deadline.
- The home was recently through construction or renovation and has fine dust in every crevice.
- Allergies or asthma in the household make a thorough deep clean, not a surface pass, a health issue.
- You simply don’t have a spare week, and a weekend isn’t enough to cover everything above.
Neat and Tidy Pros handles exactly this range of work, from standard deep cleaning to full move-in and move-out cleaning, with the full room-by-room scope covering everything this checklist lists and then some.
Tips for Organizing Cleaned Spaces to Maintain Order
A clean house stays clean longer when everything has an assigned spot, not just a temporary one. Once a room is deep-cleaned, walk through it and ask whether every item you’re putting back actually belongs there, or if it’s just returning out of habit.
Clear storage bins beat opaque ones for almost everything except closets, since you can see what’s inside without opening five containers to find one item. Label bins by category, not by room, “winter linens” travels better than “guest room stuff”, because labels by category survive a move or a reorganization.
Give high-traffic zones, entryways, kitchen counters, and bathroom vanities, a strict “surface limit.” If a counter only has room for three items, anything beyond that needs a drawer or a bin. This single rule does more to prevent re-clutter than any organizing product on the market.
Build a five-minute reset into your evening routine: dishes away, mail sorted, shoes off the floor. It’s a small habit, but it’s the difference between needing a full deep clean every few months and needing one once a year. For rooms with built-in storage systems, closet organizers and shelving units make the “everything has a spot” rule far easier to keep.
Author Perspective: Practical Tips and Common Mistakes
The biggest mistake people make with a spring cleaning checklist is treating it as a one-day sprint instead of a week-long project. Trying to deep-clean an entire house in a single Saturday leads to rushed, shallow work in the rooms you tackle last, usually the bedrooms and the garage, which get skipped entirely once fatigue sets in.
Start small and let momentum do the work. Recruit household members for specific rooms rather than trying to run the whole operation solo. Label every donation box the moment you fill it. Reuse bins and containers you already own instead of buying new storage before you know what you actually need to store.
The other recurring mistake: ignoring vents, filters, and appliance interiors because they’re invisible day to day. Those are the spots that quietly affect air quality and appliance performance all year. Print the checklist, hand off a room or two to someone else in the house, and treat the whole thing as a schedule, not a single exhausting day.
— Neat
How Neat and Tidy Pros Handles Your Spring Deep Clean
Neat and Tidy Pros is the option for anyone who’d rather hand off the week-long checklist above than work through it themselves, without signing up for a recurring contract or an inflexible package. You book a deep clean, a move-in or move-out clean, or even just the windows, and a team handles the parts of this list that eat the most hours: ovens, grout, baseboards, and vents.

A typical deep-clean appointment covers the full scope this article walks through, kitchen appliances, bathroom grout and fixtures, dusting from ceiling to baseboard, and the overlooked spots most people skip entirely. Scope and time vary by home size, so an appointment for a two-bedroom apartment runs shorter than a full house. You can see how the process works in Neat and Tidy Pros’ guide to residential cleaning, or check what’s specifically included in a residential deep clean before booking. If your spring cleaning also happens to line up with a move, the move-in and move-out cleaning service covers that scope directly. Ready to skip a step of the checklist? Browse available services and get a quote for the rooms you’d rather not tackle yourself.
Sources
The recommendations throughout this checklist draw on guidance from established cleaning and consumer health authorities. For deeper reading on any of the topics covered above:
- Spring Cleaning Plan | The American Cleaning Institute (ACI)
- 2026 Spring Cleaning: Tips, Tricks, And Tools For Success — Forbes
- Spring cleaning checklist — Martha Stewart
- Spring cleaning checklist experts follow — GoodHousekeeping